• Skip to primary navigation
  • Skip to main content
  • Skip to primary sidebar
Biting into Life logo
  • Recipes
    • Quick & Easy Meals
    • Comfort Food
    • High-Protein Plant-Based Meals
    • Main Dishes
    • Breakfast
    • Snacks
    • All Recipes
  • Ressources
    • My products
    • Nutrition Guides
  • About Me
    • My Mission
    • My Story
    • Press & Media
    • Food Stories
    • Contact Me
  • Freebies
  • English
    • Français
  • Nav Social Menu

menu icon
go to homepage
subscribe
search icon
Homepage link
  • Home
  • Recipe Index
  • About Me
    • My Mission
    • My Story
  • Nutrition Guides
  • Subscribe
  • English
    • Français
    • English
      • Français
    • Facebook
    • Instagram
    • Pinterest
    • Twitter
    • YouTube
  • ×
    Home

    Blog

    Crowd-Pleasing Vegan Buffalo Cauliflower Wings

    Jul 5, 2018 · Leave a Comment

    Food looking like Buffalo wings in a basket

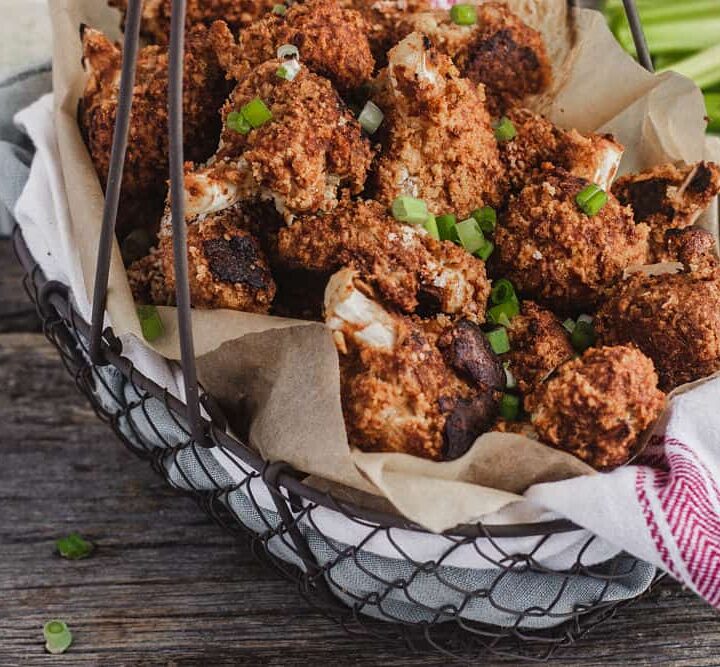
    Look at that. Some nice savory Buffalo wings. Buffalo cauliflower wings, that is. Yup. Crazy, huh?

    Tell me, is coming up with totally plant-based recipes that are better alternatives to meat dishes and appeal to your taste buds your biggest challenge?

    If you’re a total meat eater, living a wingless life is probably a hard thing to do. And if you’re a plant-based eater, then living a tasteless life is hard to do too!

    Food looking like Buffalo wings in a basket
    Buffalo Cauliflower Wings

    I’m so stoked to finally post my Buffalo Cauliflower ‘Wings’ recipe!

    I can’t say they taste like chicken wings cuz I don’t even remember what they taste like, it’s been ages. But my man and lil’ man loved them.

    These took many tries to get them right, and I think I’m pretty close to the real thing.

    You’ll be surprised by how “meaty” cauliflower really is.

    4 Surefire Strategies to Guarantee Your Cauliflower Wings Are Crispy

    A close-up of breaded cauliflower florets on a baking sheet
    Breaded cauliflower florets

    Let me tell ya, making crispy look-alike chicken wings was a challenge. When I looked at most of the photos and videos, anyone would be fooled. I was comparing different recipes like a mad woman trying to figure out why I failed at my first attempts!

    Many food bloggers made it look so easy. It’s as if they were saying (in an imaginary high-pitched voice): "It’s so easy to make cauliflower wings, yea! All you have to do is this and this and that. Peace of caaaake!"

    Yeah, sure. I guess it is easy when they’re fried. But baking them to make them healthier is another ball game. Maybe that’s where the difficulty was, who knows (although I’ve seen many successful baked versions).

    In the end, after a few fails, here’s what I learned:

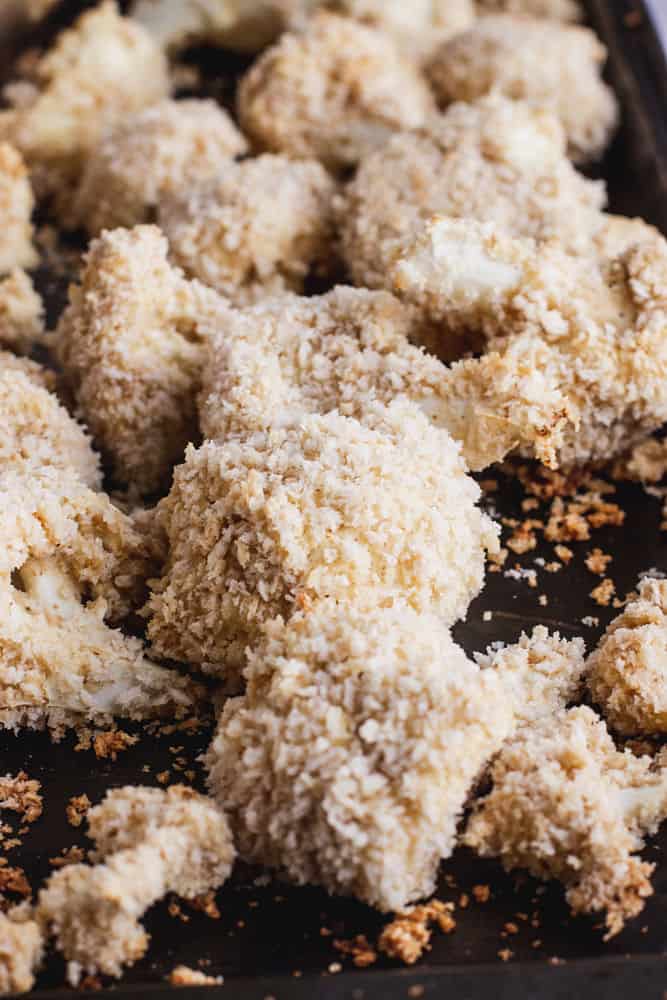
    1. For a wrinkled skin appearance, you need to dip the cauliflower florets in a batter and bread it. Some recipes use only flour, but adding breadcrumbs is key to making them crispy before the sauce goes on. (Gluten-free breadcrumbs can be used instead, but you might want to toast them to make them crispier.)
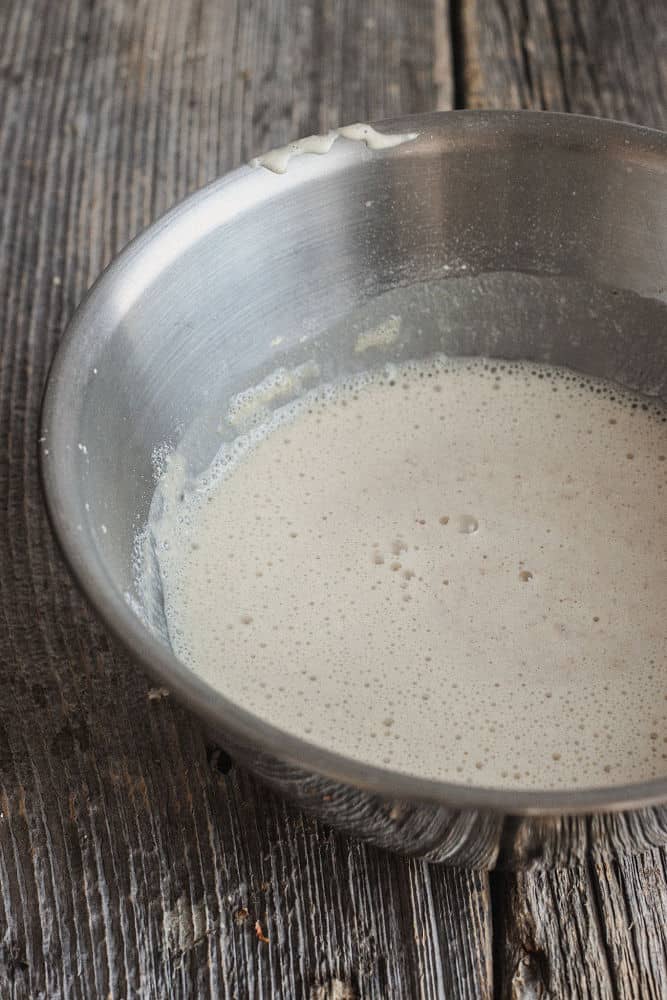
    2. Your batter can’t be too watery, or else it will not cling to the cauliflower and the 'wings' will be soggy. Oh, and you need to make sure the cauliflower is not overly coated with the batter, or else it will pool on the baking sheet. Drain as much as possible.
    3. Grease the pan lightly with vegan butter instead of olive oil as olive oil will burn the bottom of the florets.
    4. Bake the coated cauliflower at a high enough temperature so the water from the sauce evaporates fast, like 450°F.

    I learned a lot of these tricks from Jessica in the Kitchen. Her suggestions seemed really helpful and her photos were pretty convincing.

    Now let’s talk about what makes these cauliflower wings stand out.

    The Sweet Sides of Sauces

    A bird's eye view of a hot sauce and ranch dressing in small jars
    Hot sauce and ranch dressing

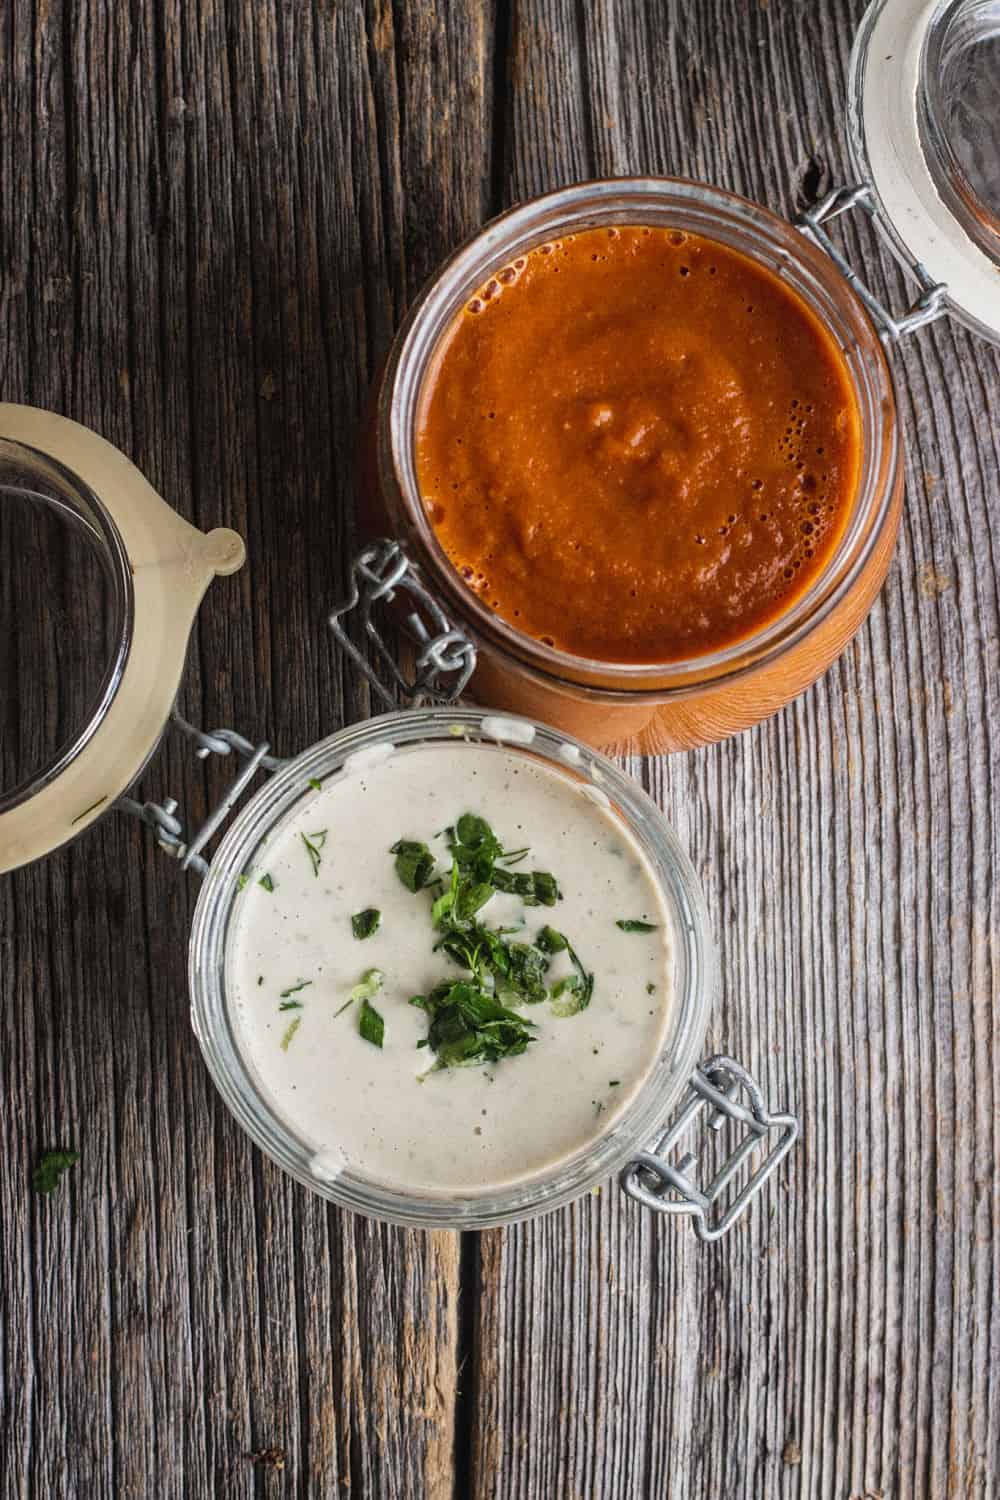
    Buffalo wings are usually covered with hot sauce and served with a ranch dressing. Most of the time, store-bought sauces like Franks Redhot Buffalo Wing Sauce usually contain preservatives, additives, and other unhealthy ingredients.

    That’s why, I decided to make my own, homemade BBQ hot sauce — well mildly hot, because lil’ man can’t handle the heat. You know what? Me neither. I’m a total wuss.

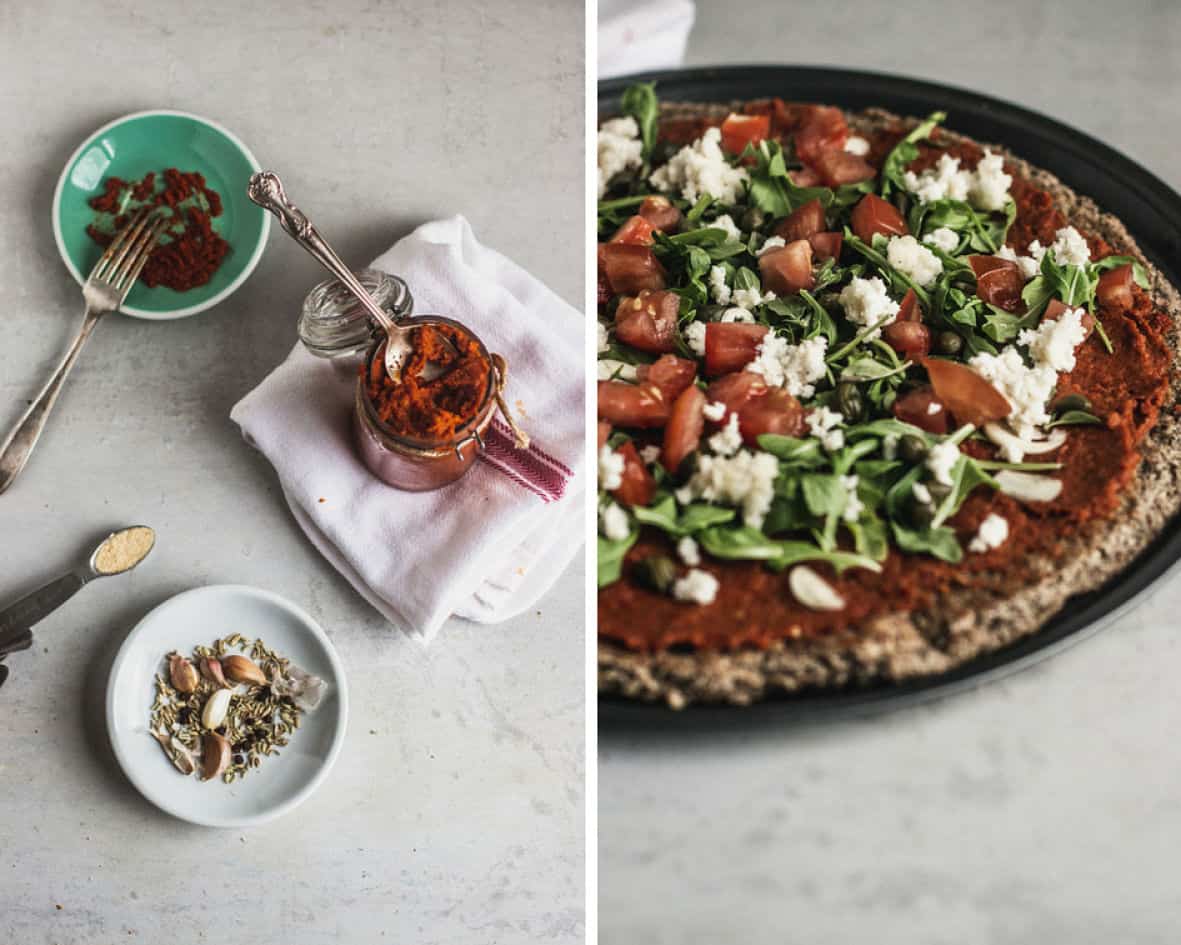
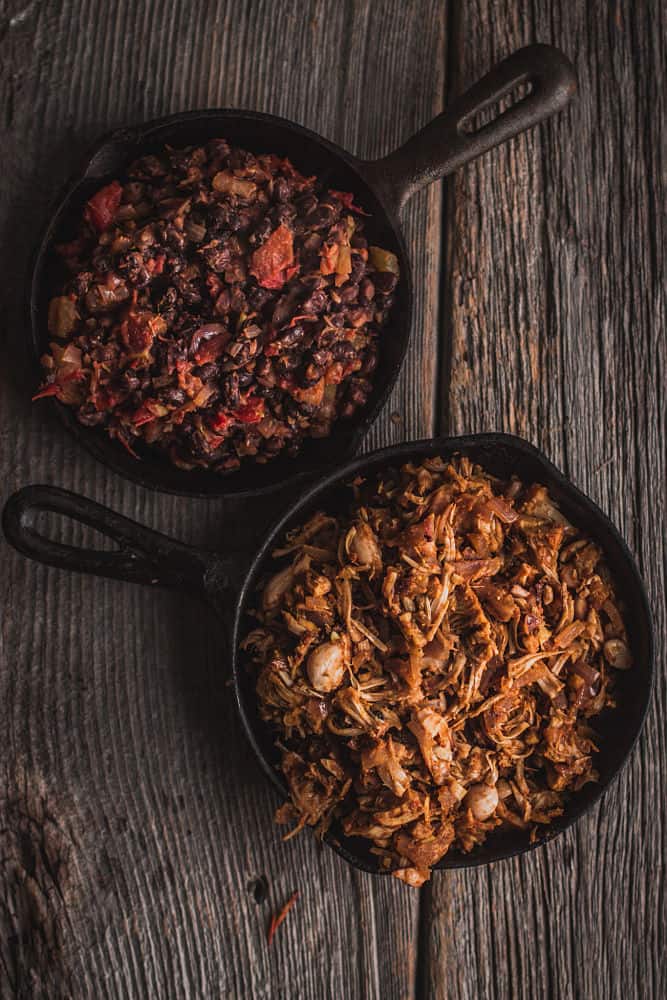
    This sauce contains mostly wholesome ingredients like sun-dried tomatoes and dried chipotle pepper, which are soaked beforehand to soften them. (If you don’t want to bother with this step, well, I won’t judge you if you use a store-bought sauce, okay?)

    Important note! you should start soaking them ahead of time, at least 2 hours. Ideally, do this a day prior.

    The sauce is then spiced with apple cider vinegar for acidity, ginger and mustard for hotness, and other spices for depth of flavor. If you don’t find dried chipotle, you can replace it with dry flakes.

    The "BBQ" sauce recipe comes from my collections of recipes from my raw food days. I adapted it to make it with fewer ingredients. I should just call it a mild hot sauce actually (and drop the quotation marks while I’m a it). My man invited a colleague over for dinner the other day, and he was like: "Nah, that’s not a BBQ sauce. But I’m amazed at the taste, though!" ?

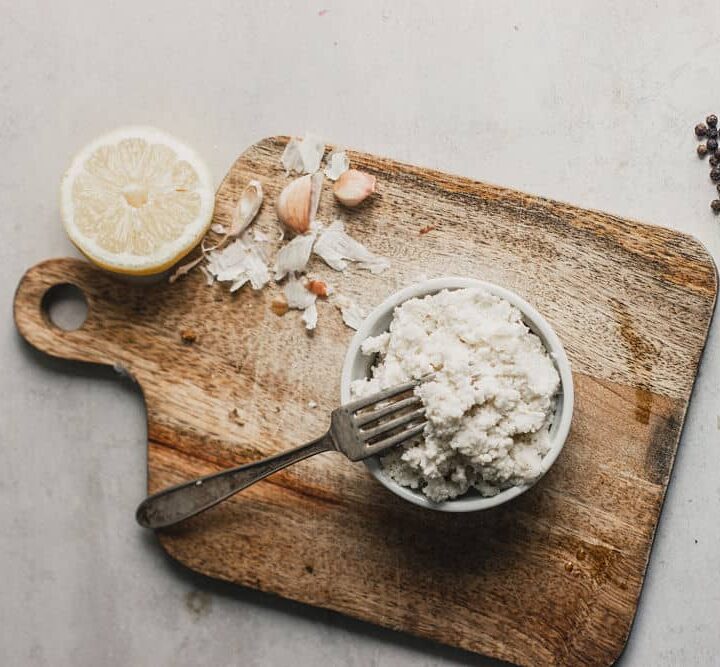
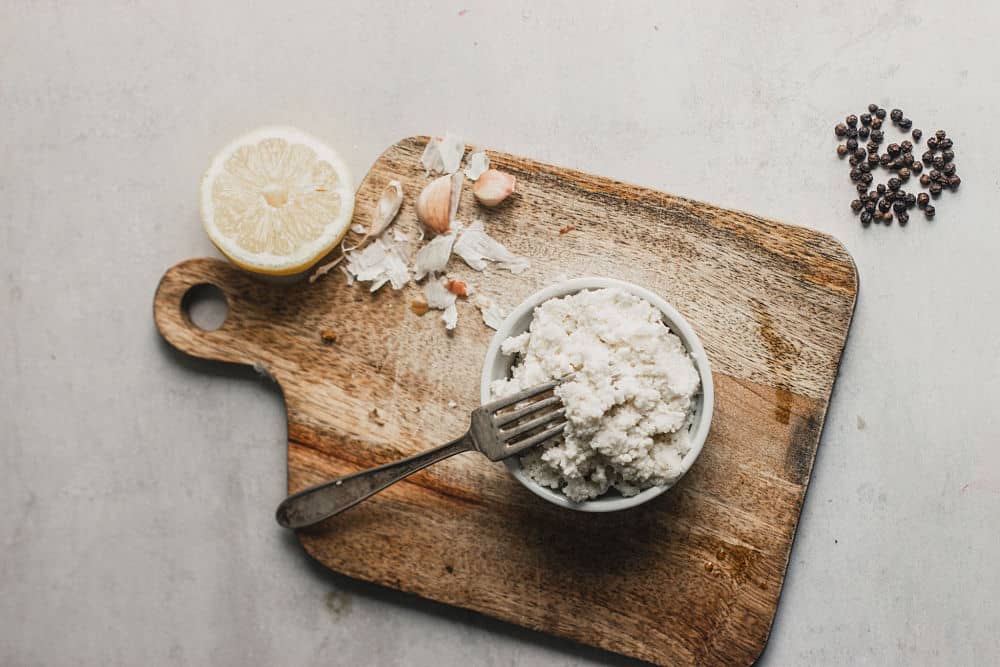
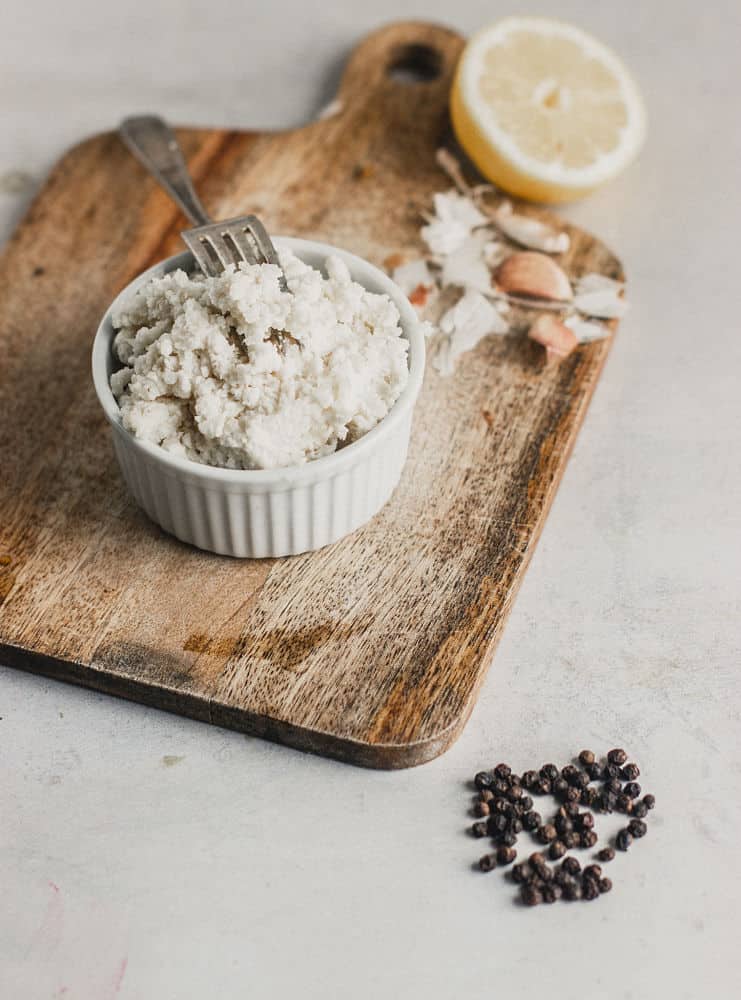
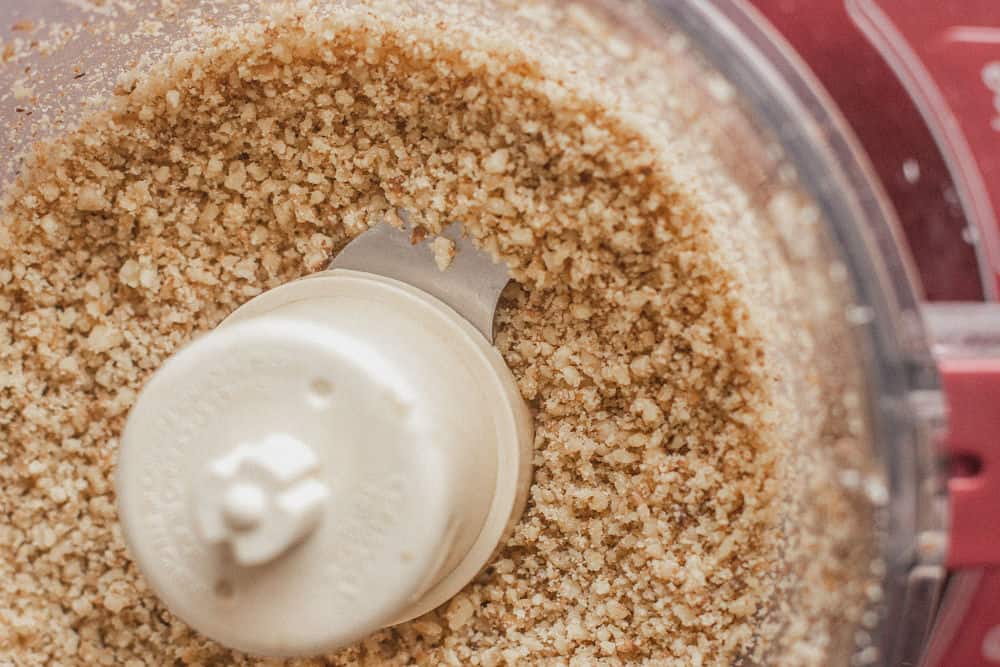
    Now my ranch dressing? I was really pleased with it. I made it with homemade almond milk (any plant-milk will do), cashew nuts, nutritional yeast, spices, and herbs. The flavors were well-balanced, so the dressing was all ready to receive my cauliflower bites with open arms.

    Finger-Licking Cauliflower Bites Every Meat Eater Will Love

    I’ve had been longing to do this for the Super Bowl weekend last February, but I was out of luck. My temptations to prepare them never left me, though. For July, I felt inspired to create BBQ or picnic-inspired recipes.

    The cauliflower is cut into florets with tips resembling a drumstick. (Don’t worry if they don't resemble them to a tee. Do your best.) Then, the "drumsticks" are dipped into an almond milk batter and thickened with chickpea flour.

    Almond milk batter

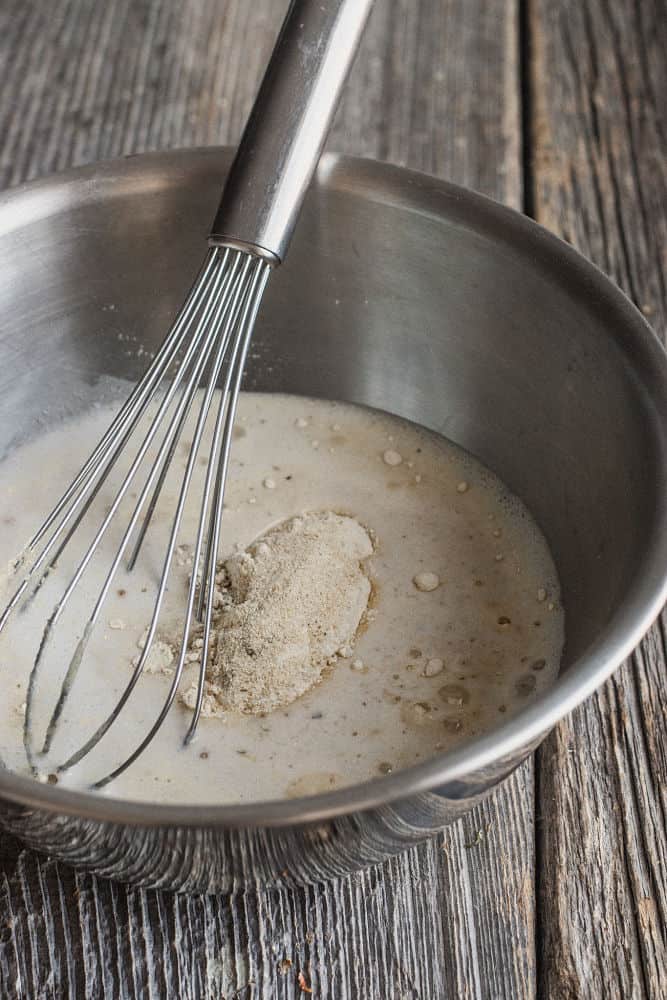
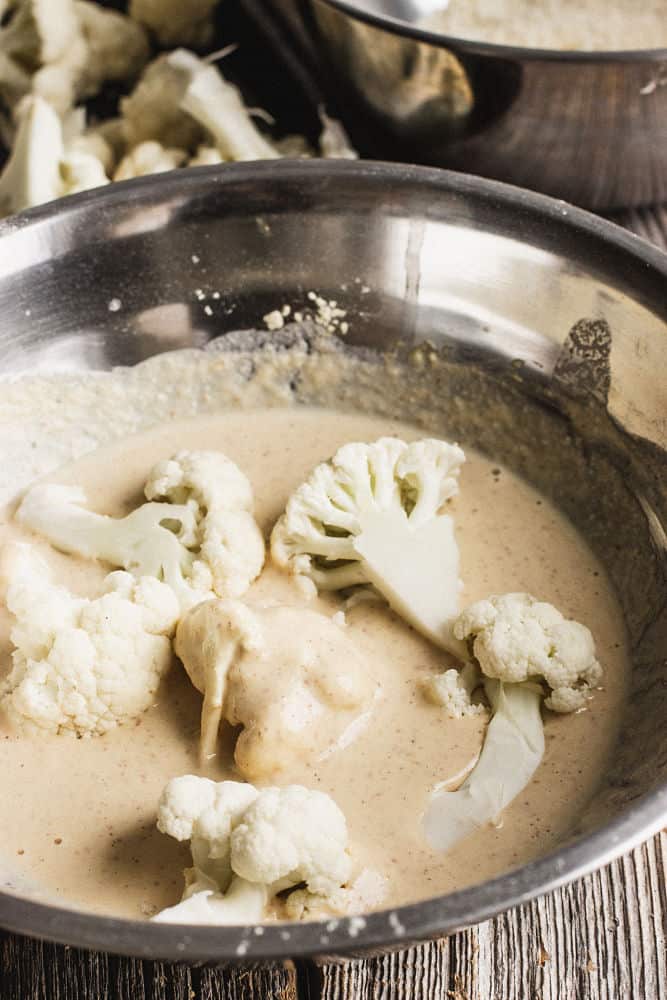
    I love the idea of using chickpea flour as a thickener as it contains some good quality proteins (the one I use has 6 g per ¼ cup). Some recipes add corn flour if all-purpose is used instead, which is another option.

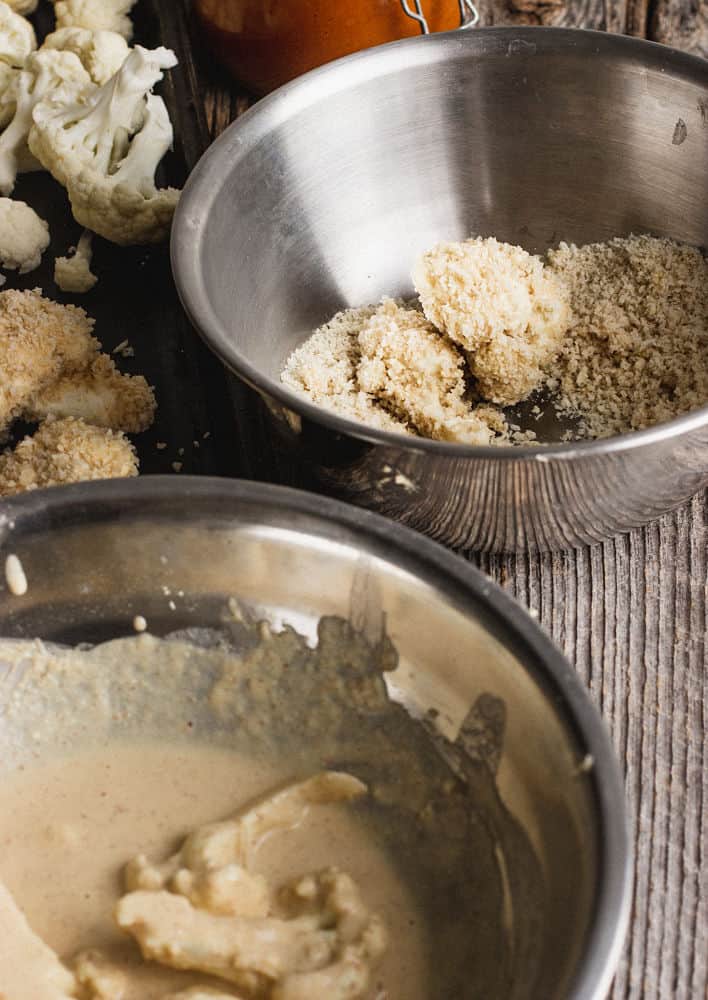
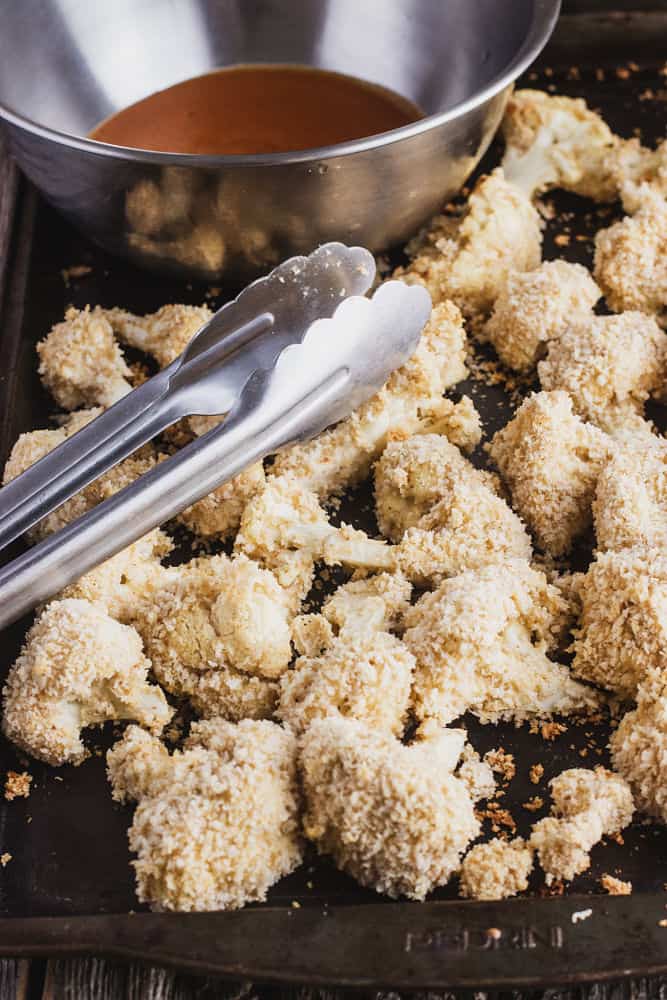
    After, this is when the crispiness comes in. You cover the preparation in breadcrumbs (I used Panko breadcrumbs) and bake everything for a little bit until golden. Meanwhile, you finish preparing the sauce.

    Breading the cauliflower florets

    For the grand finale, you coat the pieces in hot sauce and bake them again.

    Breaded cauliflower florets being covered in hot sauce
    Putting sauce on the breaded cauliflower florets

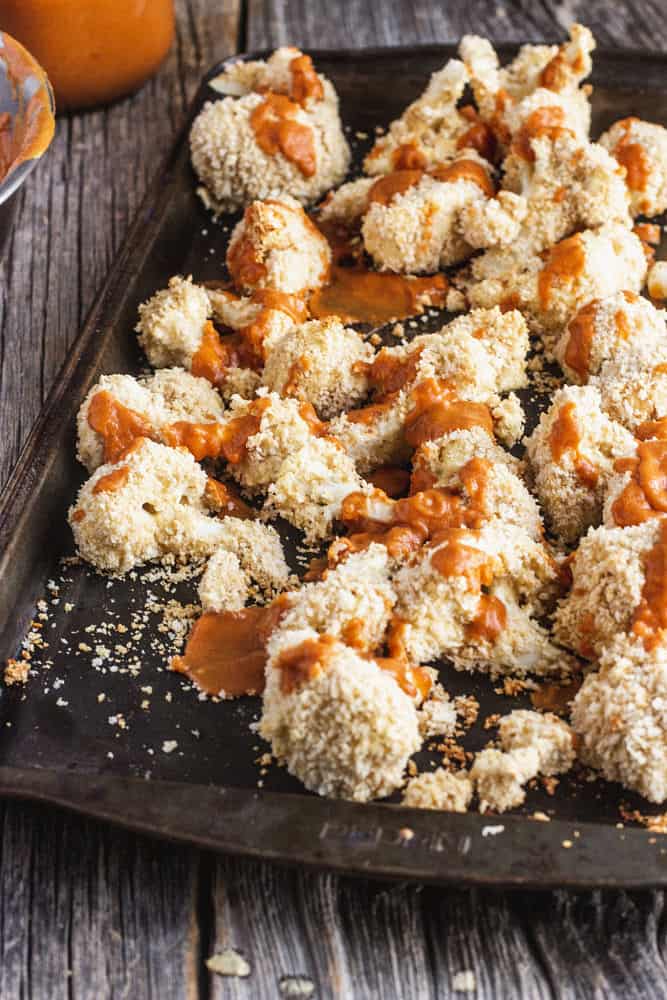
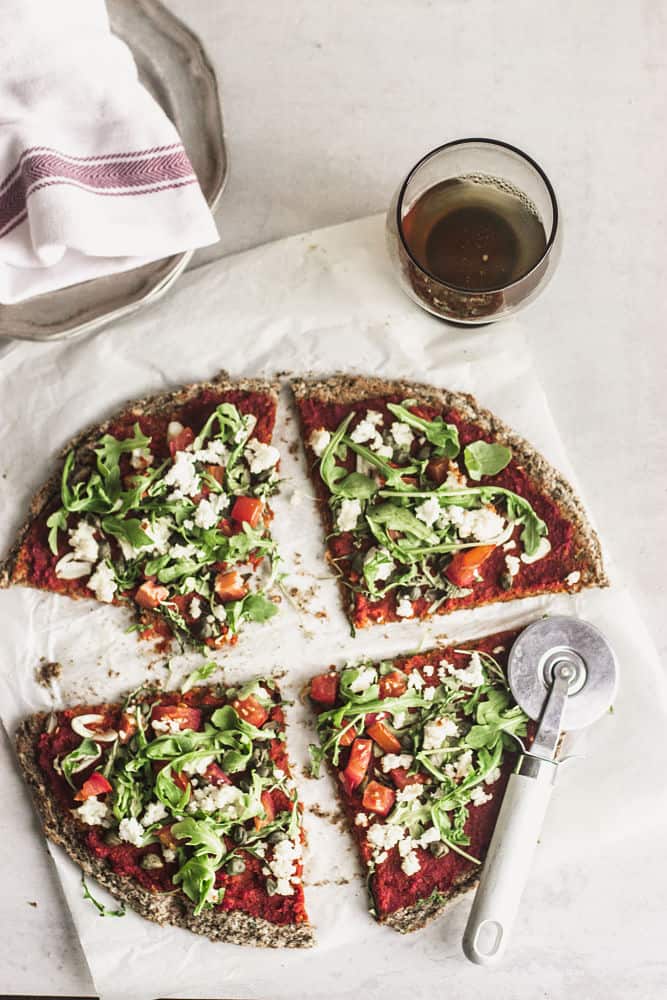
    When they came out of the oven, you could see that golden dark caramel color covering homogeneously the little white trees. As you get closer, you can admire the nooks and crannies on the surface and sniff the sharp scent emanating from the apple cider vinegar and the mustard.

    Close-up of baked cauliflower florets in red sauce
    Baked cauliflower florets looking like Buffalo wings

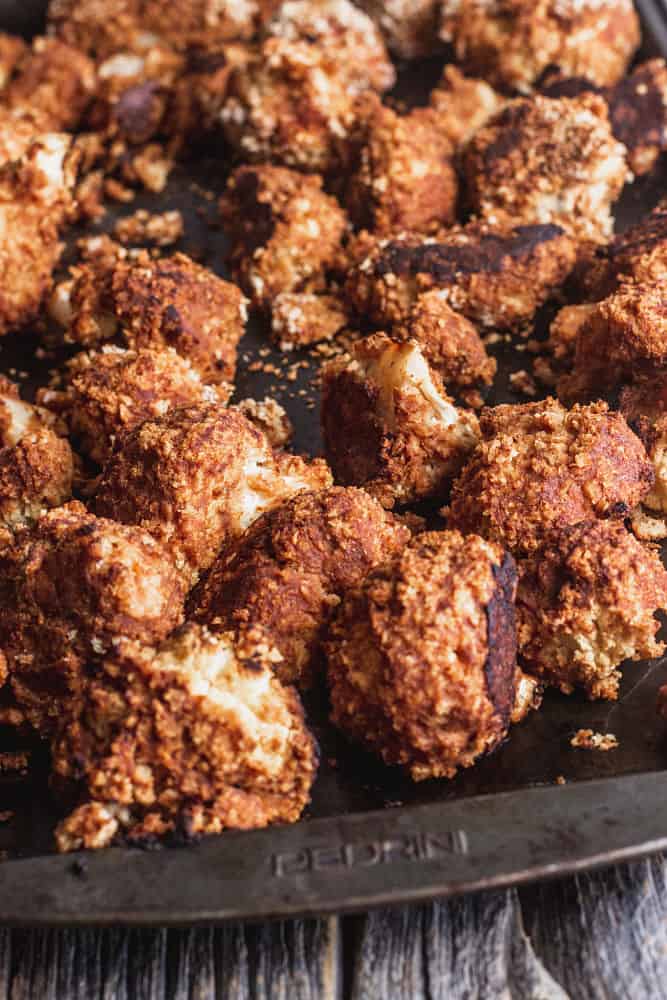
    When you cut one "wing" open, the knife slides softly to unveil the white flesh. And when you sink your teeth into one, what hits you first is the crispy and slightly spongy layer. As your tongue hits it, you are comforted with the warmth of tomato flavor and awakened by the heat of the ginger.

    Dipping the so-called wings in the ranch dressing

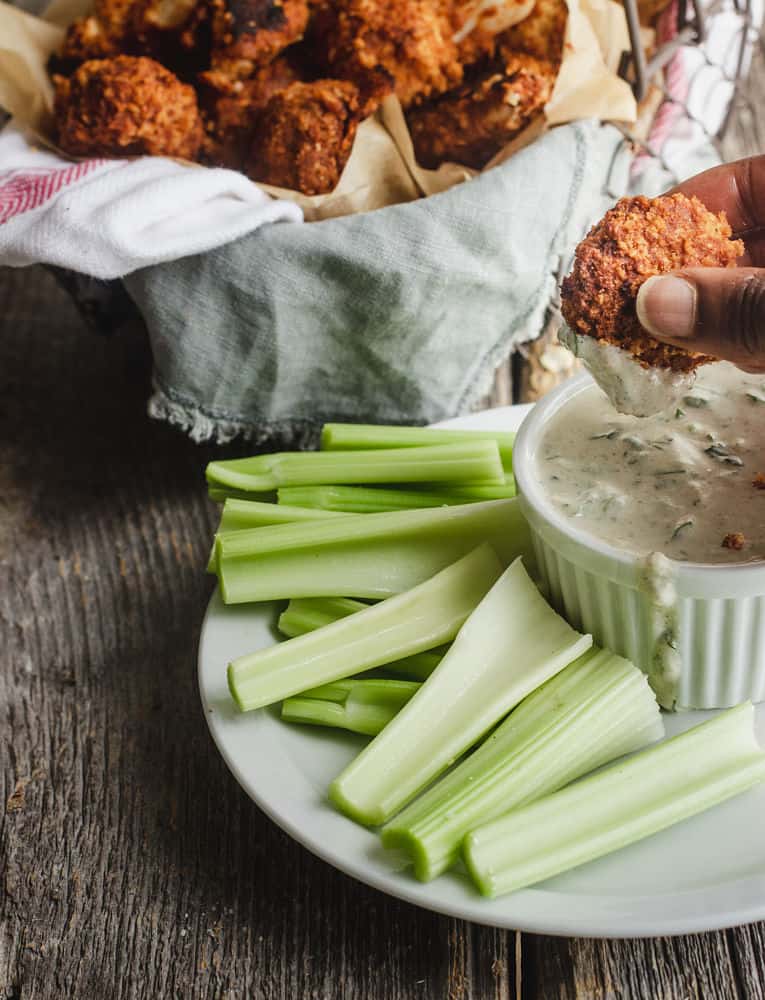
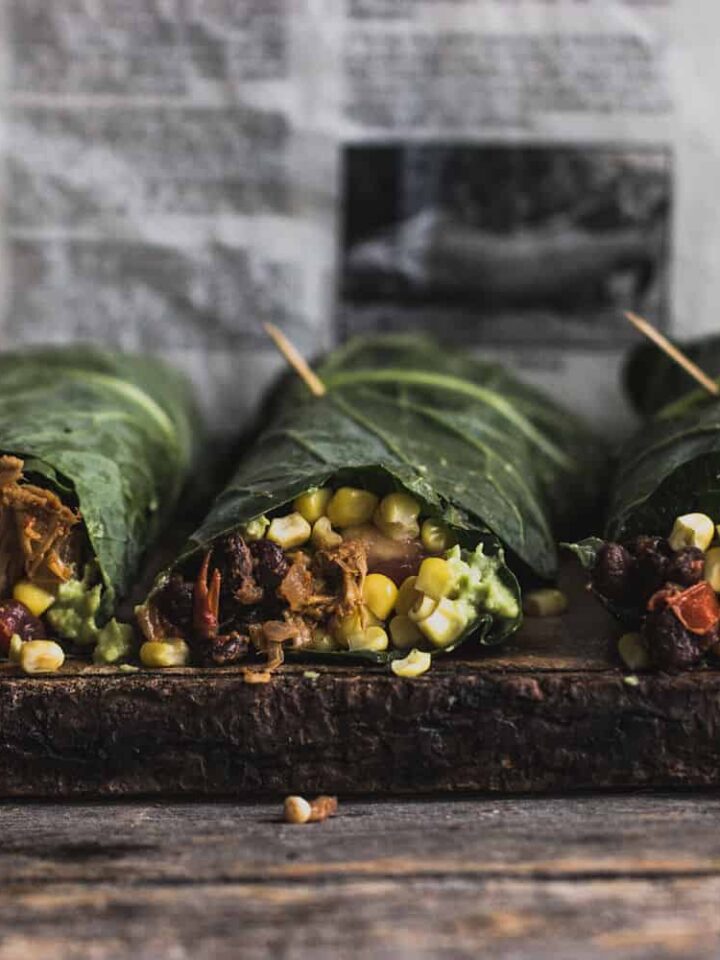
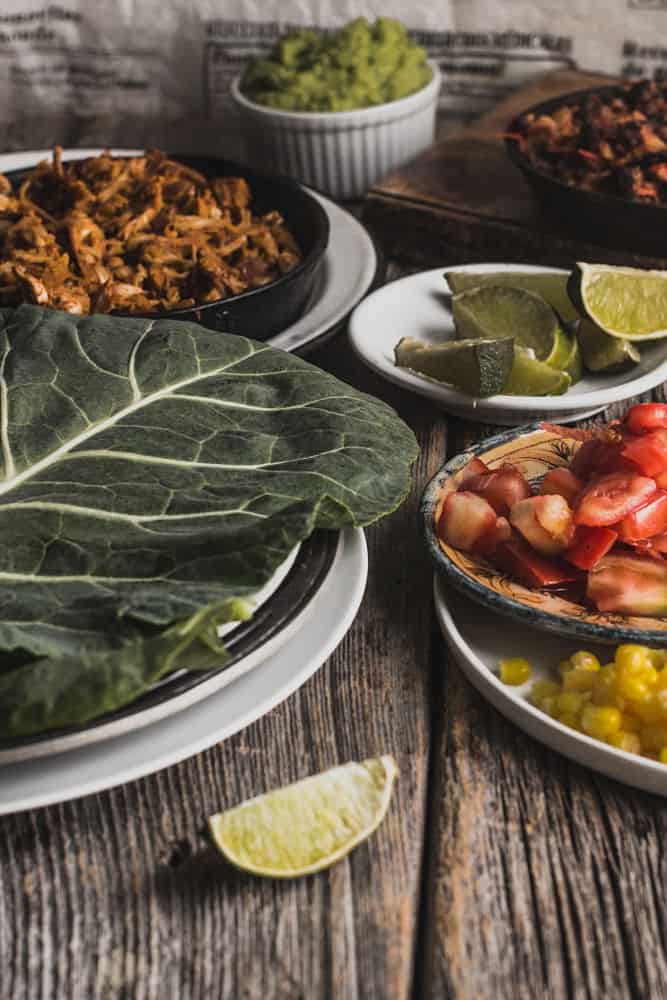
    To cool off the heat, celery sticks are usually served with this dish so don’t skip that step. So is the ranch dressing. You can devour the cauliflower bites alone as appetizers or use them as fillers in tacos. Pierce them with skewers and accompany them with grilled vegetables. Toss them in salads or settle them over rice. Your options are endless.

    Make This Now

    With a recipe like this one, you won't struggle with finding satisfying meatless recipes.

    Now you learned how sauces are everything. Sauces are the secret to elevating your dishes.

    You also learned that making cauliflower wings is easy. All you need is a batter, breadcrumbs, and a hot sauce. Then you accompany them with cooling agents like a ranch dressing and celery.

    And when it comes to crispy textures, breadcrumbs go a long way.

    So go ahead. Find comfort in those hot, spicy, and tomato-flavored cauliflower wings.

    And surprise yourself and your friends with healthier "meat".

    Vegan Buffalo Cauliflower Wings

    Food looking like Buffalo wings in a basket

    If you try this recipe, I want to know about it! I always appreciate your feedback. Leave a star rating in the recipe card right below and/or a review in the comment section further down the page. You can also follow me on Pinterest, Facebook, or Instagram. Sign up for my email list, too!

    Food looking like Buffalo wings in a basket
    Print Recipe
    5 from 1 vote

    Ailes de chou-fleur Buffalo

    Croustillantes, réconfortantes et savoureuses, ces ailes de chou-fleur Buffalo sont tellement bluffantes que tout mangeur de viande en serait dupé. Essaye-les !
    Prep Time2 hours hrs 25 minutes mins
    Cook Time40 minutes mins
    Total Time3 hours hrs 5 minutes mins
    Course: Appetizer
    Cuisine: American
    Keyword: cauliflower, farine de pois chiche
    Servings: 4
    Calories: 371kcal
    Author: Naïby

    Ingredients

    Sauce piquante douce

    • ⅓ tasse de tomates séchées au soleil
    • ½ piment chipotle séché épépiné (environ 4 g) (ou substitut 1 cuillère à café de flocons secs)
    • 3 cuillères à soupe de vinaigre de cidre de pomme
    • 2 cuillères à soupe de tamari non pasteurisé au goût
    • 1 ½ cuillère à soupe de nectar d'agave ou sirop d'érable
    • 1 cuillère à soupe de racine de gingembre râpé
    • 1 cuillère à café de moutarde de Dijon
    • 1 cuillère à café d'ail en purée environ 2 clous de girofle
    • 1 cuillère à café de poudre d'oignon
    • 1 cuillère à café de paprika fumé
    • ½ cuillère à café de sel
    • ½ cuillère à café de poivre noir moulu
    • ¼ de cuillère à café de poivre de Cayenne facultatif

    Ailes de chou-fleur

    • 1 chou-fleur (environ 1 lb)
    • ¾ tasse de lait d'amande non sucré ou 1 tasse de lait d'amande non filtré maison
    • ¾ tasse de farine de pois chiches
    • 1 cuillère à café de poudre d'oignon
    • ½ cuillère à café de poudre d'ail
    • ¼ cuillère à café de sel
    • ¼ cuillère à café de poivre noir moulu
    • 1 ½ cuillère à café tasse de chapelure
    Get Recipe Ingredients

    Instructions

    • Préparer d'abord la sauce : faire tremper les tomates séchées au soleil et le piment chipotle dans 1 ½ tasse d'eau pendant 2 heures.
    • Préchauffez le four à 450 °F.
    • Graisser légèrement une plaque à pâtisserie avec du beurre végétalien ou du spray à la noix de coco. Il est également possible de la tapisser de papier parchemin ou de papier d'aluminium graissé.
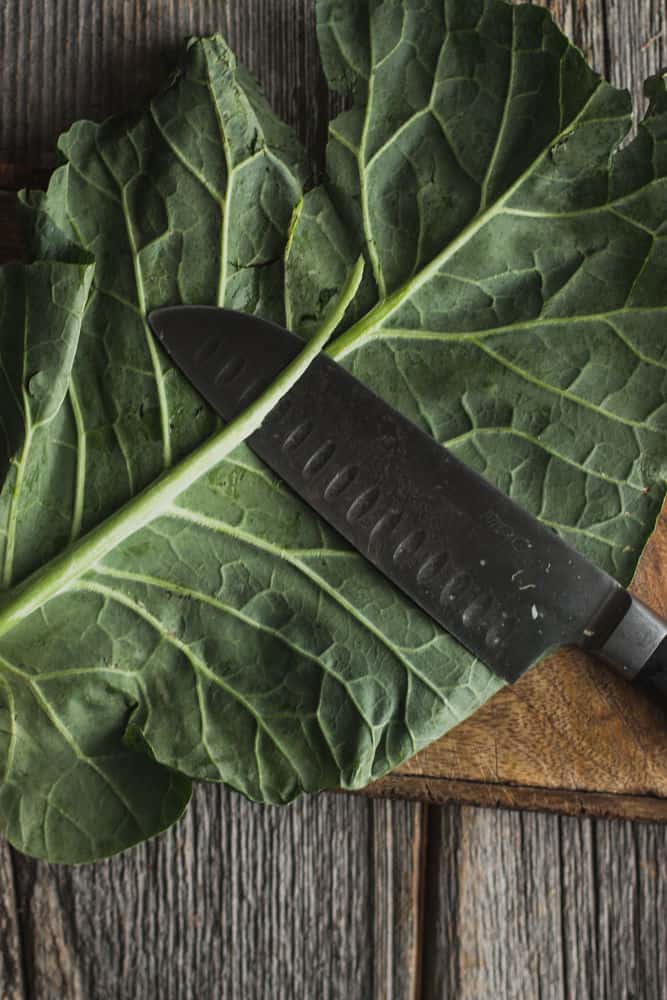
    • À l'aide d'un couteau, retirer les fleurons du chou-fleur. Hacher le chou-fleur en petits morceaux pour ressembler à la forme d’ailes.
    • Dans un saladier, fouetter le lait d'amande, la poudre d'oignon, la poudre d'ail, le sel, le poivre et bien mélanger.
    • Dans un autre bol, préparer la chapelure et placer le bol de chapelure près du bol de pâte.
    • Mélanger le chou-fleur dans la pâte une à la fois, en secouant l'excédent de pâte. Ne pas les laisser pas tremper. Ensuite, enduire complètement les morceaux de chou-fleur avec la chapelure et les place sur la plaque à pâtisserie. Cuire jusqu'à ce que la chapelure soit dorée, environ 20-25 minutes.
    • Pendant ce temps, finir la préparation de la sauce. Dans un mélangeur haute puissance, verser l'eau de trempage et tous les ingrédients et mixer pour obtenir une consistance homogène. Ajouter plus d'eau pour diluer la sauce comme souhaité. Tu devrais te retrouver avec environ 2 ¼ tasses de sauce. Transférer dans un petit bol à mélanger et réserver.
    • Retirer les fleurons cuits du four. Mélanger les morceaux dans la sauce à l'aide de pinces ou de tes mains. Ne pas recouvrir excessivement, sinon ils deviendront détrempés. Alternativement, mettre 1 tasse de sauce dans une assiette et secouer l'assiette pour que les fleurons tournent et soient couverts sur toute la surface. Faire cuire encore 10-15 minutes jusqu'à ce que la sauce soit sèche, en tournant les ailes au moins une fois.
    • Servir immédiatement avec des bâtonnets de céleri et une vinaigrette ranch.

    Notes

    Les ailes de chou-fleur Buffalo sont mieux servies fraîches mais conservées dans un récipient hermétique, elles se conserveront 4 jours (elles se ramolliront avec le temps.)

    Nutrition

    Calories: 371kcal | Carbohydrates: 68g | Protein: 15g | Fat: 5g | Saturated Fat: 1g | Polyunsaturated Fat: 2g | Monounsaturated Fat: 1g | Sodium: 893mg | Potassium: 1114mg | Fiber: 10g | Sugar: 21g | Vitamin A: 393IU | Vitamin C: 74mg | Calcium: 198mg | Iron: 5mg

    Get Your Free Plant-Based Eating Toolkit and More

    Subscribe to my newsletter and unlock my plant-based course, nutrition charts, recipe secrets, and exclusive updates to prepare wholesome, varied & balanced meals effortlessly. All you need is a good appetite. Subscribe!

    Smiling girl with big afro sitting cross-legged on a sofa

    Hi there!

    I'm on a mission to help you get nutrient-dense, easy, and mouthwatering plant-based recipe ideas so you can feel stimulated, well-equipped, and confident to eat and cook better.

    Learn more about me →

    How to Make Dairy-Free Ricotta-Style Cheese in Less than 10 Minutes

    Jun 28, 2018 · Leave a Comment

    Admit it.

    If you still haven’t fully transitioned to a vegan diet, one main reason could be that your love of cheese is a major stumbling block. It's like trying to jump over tall buildings.

    And you're anxious for ANY “cheese-like” recipes that will fill the void.

    Because cheese is so addictive. It really is. Really!

    Hey, I don’t blame you. You need to be someone who’s never really cared for cheese to be able to give it the cold shoulder.

    Whether you’re a severe “cheesehead” or not, cheese brings a delicious flavor, a second layer of flavor to a lot of recipes that’s hard to deny. (Of course, it doesn’t if you hate it.)

    So what’s a cheese lover to do? Find an alternative that will satisfy your cheese craving. That’s what! Well, something that comes close, anyway.

    And you know what? I’ve got the perfect recipe that will do just that.

    Bird's eye view of a ricotta style cheese in a ramekin on top of a small wooden cutting board
    Dairy-free ricotta

    The Biggest Issues with Most Nut-Based Dairy-Free Cheese Recipes

    If you look around the web or elsewhere, you’ll notice that most nut cheese recipes call for cashews. There’s a reason for this.

    Cashews give a creamy texture and have this particular taste that, when mixed with the right ingredients, you get something that comes really close to creamy cheese or cheese spreads. You must be like: “Okay, what’s the issue here?”

    Well, my friend, if you happen to have cashew nut allergies, you might tend to avoid cashew nut cheeses completely. (Actually, you might not have any reactions if you have a general nut allergy because the cashew nut is not technically a nut. It’s more a legume. But for safety, you’re probably doing the right thing by avoiding them.) So that’s the first issue.

    The second one is, when it comes to creating a ricotta-style cheese, cashews become too creamy and won’t give you the same texture.

    So here again, you might have to look for another alternative.

    The nuts I’m going to introduce to you will save the day.

    Why Macadamia Nuts Are the Perfect Substitute for Ricotta-Style Cheese

    Macadamia ricotta is not as popular as other ricotta-style recipes like cashew ricotta or almond ricotta. But it will truly amaze you. I got this recipe when I was teaching as a raw food teacher and I’m gonna share with you! Woot! Woot!

    The original recipe calls for two main ingredients: macadamia and lemon. You read that right! Only two main ingredients! Then you add water and salt, which we won’t call ingredients since you never run out of water and most spices (A little industry secret: That’s how most recipe books sell you on 5-ingredients this! 10-ingredient-that!).

    Okay, I know, I know… Macadamia nuts are expensive and maybe that’s why people choose cashews or almonds instead. But I did something clever to help you cut down costs.

    I divided the original quantity with blanched almonds. This recipe is actually featured in my e-cookbook I launched recently. Here, you simply add the ingredients in a food processor and that’s it. You can either grind the nuts first and add the rest of the ingredients after or mix everything together.

    Always use a food processor instead of a blender to give more texture to your concoctions.

    Now, using ground macadamia nuts in lieu of dairy won't ever create something that tastes just like the original as these round nuts are mild-tasting, rich, and sweet. Anyhow, ricotta doesn’t typically have an intense cheesy flavor, so you won’t be too far off.

    But once processed, macadamia nuts do magically transform into a spread with a texture remarkably similar to firm ricotta, thanks to their high-fat content.

    Lemon juice is used for a little tanginess and salt for saltiness. For more flavor, you can add nutritional yeast for a little cheesiness and a dash of garlic powder (or fresh garlic) for depth of flavor.

    It's a perfect basic recipe that can be played around with. Try adding herbs or other spices. You can use this homemade vegan cheese anywhere.

    • Stuff it in ravioli or cannoli (don’t add any bitter spices, though). 
    • Dollop it on pizza. 
    • Stir it in salads. 
    • Mix it in pasta recipes. 
    • Slip it in sandwiches. 
    • Or devour it as a dip with crackers or veggies.

    Make This Now

    Finding an alternative to dairy ricotta cheese — in somewhat similar texture and taste — is very possible with ingredients like macadamia nuts. You don’t have to stick to the commonly used cashew nuts or almonds only.

    Use these tiny white and mild-flavored pebbles on their own or divide them with almonds, just like I did.

    With the numerous ways to add this quick non-dairy ricotta, you can now transition to a vegan diet or dairy-free diet more peacefully. You can now fill the void. You can now still satisfy your cheese craving in a certain way.

    And most of all, you can now say: “Cheese please!”

    Almond Macadamia Nut Ricotta Cheese

    Ricotta style cheese in a ramekin on top of a small wooden cutting board
    Almond Macadamia Nut Ricotta

    If you try this recipe, I want to know about it! I always appreciate your feedback. Leave a star rating in the recipe card right below and/or a review in the comment section further down the page. You can also follow me on Pinterest, Facebook, or Instagram. Sign up for my email list, too!

    Print Recipe
    5 from 1 vote

    Dairy-Free Ricotta-Style Cheese

    This dairy-free ricotta is a great alternative to satisfy your cheese craving and mimic the traditional thing. Add it anywhere you’d like!
    Prep Time10 minutes mins
    Cook Time0 minutes mins
    Total Time10 minutes mins
    Course: Side
    Cuisine: Raw/No-Bake
    Keyword: no-bake
    Servings: 1 cup
    Calories: 897kcal
    Author: Naïby

    Ingredients

    • ½ cup almonds preferably soaked overnight (about 8 hrs) and peeled, or blanched (Notes)
    • ½ cup macadamia
    • 1-2 tablespoons lemon juice
    • 2 tablespoons water
    • ¼ teaspoon garlic crushed (about 1⁄2 clove garlic)
    • Pinch salt
    Get Recipe Ingredients

    Instructions

    • Put all the ingredients and ¼ cup water in the small bowl of the food processor fitted with the “S” blade, and process until creamy. Serve immediately or store in an airtight container in the refrigerator for up to 4 days.

    Notes

    Blanching involves dipping the almonds in hot water for a few seconds. To skip this step, buy the almonds already blanched.

    Nutrition

    Calories: 897kcal | Carbohydrates: 26g | Protein: 21g | Fat: 86g | Saturated Fat: 11g | Polyunsaturated Fat: 10g | Monounsaturated Fat: 62g | Trans Fat: 1g | Sodium: 6mg | Potassium: 769mg | Fiber: 15g | Sugar: 6g | Vitamin A: 2IU | Vitamin C: 7mg | Calcium: 249mg | Iron: 5mg

    Get Your Free Plant-Based Eating Toolkit and More

    Subscribe to my newsletter and unlock my plant-based course, nutrition charts, recipe secrets, and exclusive updates to prepare wholesome, varied & balanced meals effortlessly. All you need is a good appetite. Subscribe!

    Smiling girl with big afro sitting cross-legged on a sofa

    Hi there!

    I'm on a mission to help you get nutrient-dense, easy, and mouthwatering plant-based recipe ideas so you can feel stimulated, well-equipped, and confident to eat and cook better.

    Learn more about me →

    Easy Vegan Cauliflower Pizza Crust

    Jun 14, 2018 · Leave a Comment

    Finally, here’s a cauliflower pizza crust that has everything you’re looking for in a healthy, gluten-free pizza crust — tasty, crisp, and light.

    It holds quite well in your hands at room temperature, and it makes excellent cold leftovers (if you manage not to gobble everything).

    Do it in 7 steps and garnish it as you wish. You can eat it every day without feeling guilty!

    Bird's eye view of pizza cut in four slices and spread apart
    Vegan cauliflower pizza

    The Best Substitute for Traditional Pizza Crust

    When I spotted cauliflower-based dough recipes on the web, I was afraid I wouldn't succeed in making it. What if I fail completely? I read discouraging comments from people who complained that their attempts were soggy.

    So, being a finished perfectionist and the queen of the shortest path, I wanted a surefire recipe.

    I ended up finding a recipe from Detoxinista that looked promising.

    And I wasn't disappointed! It was perfect.

    The crust doesn’t fall apart. It's moist, and you don't even notice the taste of cauliflower.

    Be careful, though. It holds well, yes, but it remains quite fragile, like most cauliflower-based crusts. It has floppy edges and is flexible, but it’s certainly not soggy.

    I've changed a few things, like seasoning the dough, but other than that, it tastes similar to wheat flour pizza crust. This pizza smells great ?. And I was full after a single slice. I think two slices would have been the maximum because each serving is quite rich in protein.

    Well, don't expect to eat a junk food-style pizza, okay?

    But if you want to eat pizza, at least you can feel like that's what you're doing. The result is stunning!

    What's in a Cauliflower Pizza Crust?

    Here's what you need to make the cauliflower pizza crust.

    The three main ingredients

    Flaxseed - to hold the dough, I stirred freshly ground seeds and water together and let the mixture rest until a white-style egg gelatinous substance formed. It's called a flaxseed egg.

    Cauliflower - choose a fresh medium cauliflower. That's how you'll make your dough.

    Natural almonds - to grind. Commercial almond flour will do the trick too.

    Seasonings

    Garlic powder - it's hard for me to cook without garlic. Garlic powder has a more concentrated flavor than fresh garlic. But fresh crushed garlic works here too.

    Onion powder - I can't do without it, either. I use it everywhere to give flavor. In powder, it’s the same principle: the flavor is more concentrated.

    Dried parsley - it adds a small dose of iron.

    Salt - I always use sea salt.

    Toppings

    Marinara sauce - I've prepared mine, but any sauce works.

    Sliced garlic - more garlic! 

    Fresh oregano - it's an excellent choice to recall the Italian style.

    Macadamia nut ricotta - a ricotta style vegan cheese. I've prepared mine, but if you find something similar and already made, don't mind using it to save time.

    Arugula - to add color to the red surface.

    How Do You Make Cauliflower Pizza Crust from Scratch?

    The recipe begins with cauliflower florets, which are transformed into a rice texture in the food processor. Then, this cauliflower rice is lightly boiled, drained, and pressed dry. This creates the basis of the "paste."

    Apparently, it doesn't really matter the order in which you reduce the florets and cook the cauliflower rice.

    Afterward, herbs and spices are added with almond flour and a flax "egg". And finally, the dough is then shaped into a ball, patted and spread in a crust, then baked.

    Collage of 3 photos: from left to right - cauliflower-based pizza dough with a ball of cauliflower rice on top; cauliflower dough in a bowl; cauliflower rice on top; cauliflower dough shaped into a ball
    Making cauliflower rice by squeezing the water out
    Collage with 2 photos. Left: bird's eye vire of 2 small coffee plates with seasonings and next to a marinara sauce in a small Mason jar; right: Fully garnished Vegan Cauliflower Crust Pizza with Marinara Sauce
    Cauliflower pizza crust dough
    1. Obtain cauliflower rice by reducing cauliflower florets in the food processor.
    2. Place the lightly boiled cauliflower rice in a cheesecloth or nut milk bag.
    3. Squeeze dry.
    4. Add the flour to the almonds and an "egg" of flax and season the dough.
    5. Shape the dough into a ball.
    Side by side photo of the marinara sauce in a pot and the garnished pizza
    Homemade marinara sauce
    1. Spread out the dough.
    2. Garnish the cauliflower dough and bake.

    My Best Tips

    To make this pizza crust a success, I spread the dough with a slanted spatula on a pizza pan lined with parchment paper. I kept the edges a little thicker than the center. This allows the middle of the dough to cook faster.

    The key to getting a dry vegan cauliflower pizza crust that you can hold with your hands is to drain the moisture first as much as possible.

    Use another piece of parchment paper to help you turn the cauliflower pizza crust.

    Other Ways to Make a Cauliflower Pizza Crust

    The dough: If you have nut allergies, you can try ground sunflower or pumpkin seeds. Maybe even hemp protein powder would work. Also, I've seen some recipes that use other binders like cornstarch or potato starch instead of arrow-root.

    What to Put on Cauliflower-Based Crust Pizza?

    Sauce: I used a marinara sauce that I made from scratch, but you can use any one bought in the grocery store.

    Cheese: Make your own mock cheese with almonds, cashews, or macadamia nuts as a base.

    Topping: I topped my pizza with pizza-inspired ingredients that my boyfriend always orders from a restaurant we love in Mile End. Pizzeria No. 900. It contains arugula, garlic, oregano, tomatoes, and capers. There’s also Parmesan cheese, breadcrumbs, and some type of cold meat.

    I didn’t add the last three. I replaced Parmesan with a macadamia nut ricotta, and next time I'll try to make some type of breadcrumbs to add more crunch and color contrast of green vegetables. Play with the toppings. I don't need to tell you that you can add onions, red peppers, olives... whatever.

    Is Cauliflower Pizza Crust healthy?

    For people who are following low grain diets or animal-free foods, this crust is an excellent option.

    As it’s composed mainly of cauliflower, it’s low in calories.

    What's more, cauliflower is one of the anti-cancer and anti-inflammatory foods. This crust also contains flaxseeds, which are ideal for reducing the risk of cardiovascular disease and improving your cholesterol levels.

    Another thing, flaxseeds increase your protein intake.

    Finally, these two ingredients are full of fiber, which is low in carbohydrates!

    Prompt answers to your other questions

    Does cauliflower crust pizza contain flour? It doesn't contain white flour, no. But instead almond flour. Almond flour is produced from ground almonds.

    Is cauliflower crust pizza gluten-free? Because almond flour is used, it’s indeed gluten-free.

    Does cauliflower crust pizza have carbs? Like all foods, it obviously contains carbohydrates. That said, the pizza dough is made from cauliflower, which is very low in carbohydrates. A cup of cooked cauliflower contains only 2.2 g of carbohydrates.

    Is cauliflower crust pizza better for your health? If I have to compare cauliflower pizza to the usual pizza crust, I’d say it's better for you if you have intolerances to gluten and animal byproducts, such as dairy products (including cheese) and eggs. And if you want to lose weight, cauliflower pizza crust is much lower in calories.

    Can you freeze a cauliflower pizza crust? Simply spread the pizza dough on a pizza pan and cover it with saran wrap before putting it in the freezer.

    Prepare this cauliflower crust pizza now!

    It's rare to find a healthy pizza with non-binding ingredients, but no more now!

    Now you can have a grain-free, egg-free, dairy-free pizza crust at your fingertips. Now you can indulge in a pizza that's really, really, really good for you. Now you can bite into something that will make you say: Mamamia!

    So run to your kitchen and get cooking!

    Bon appétit!

    Vegan Pizza with Easy Cauliflower Crust

    Slightly adapted from Detoxinista.

    Pizza cut in four slices and spread apart
    Vegan Cauliflower Pizza with marinara sauce, capers, arugula, and macadamia ricotta cheese
    Print Recipe
    5 from 1 vote

    Vegan Cauliflower Pizza Crust

    Crispy, light, and healthy, you’ll be able to indulge in this grain-free cauliflower pizza crust without feeling guilty at all! Temps de préparation
    Prep Time30 minutes mins
    Cook Time1 hour hr
    Total Time1 hour hr 30 minutes mins
    Course: Main
    Cuisine: American, Canadian
    Keyword: cauliflower, flax seeds
    Servings: 1 pizza
    Calories: 550kcal
    Author: Naïby

    Ingredients

    Cauliflower-based crust

    • 3 tablespoons flax seeds ground or flax meal (Note)
    • 6 tablespoons water
    • 1 lb cauliflower florets fresh or frozen (about 4 cups) 454 g
    • ½ cup almonds ground
    • ½ teaspoon garlic powder
    • ½ teaspoon onion powder
    • ½ teaspoon dried parsley
    • ½ teaspoon salt

    Toppings

    • Marinara sauce
    • Finely sliced garlic
    • Fresh oregano leaves
    • Macadamia nut ricotta
    • Arugula
    Get Recipe Ingredients

    Instructions

    • Preheat the oven to 400 ºF and cover a pizza plate with parchment paper. You can also cut parchment paper to match the shape of the perforated pan.
    • In a medium bowl, add ground flaxseed and water and let stand until mixture thickens.
    • Place the cauliflower florets in the large bowl of the food processor with an "S" blade and operate until reduced to a rice texture. Pour the cauliflower "rice" into a large saucepan, add enough water to cover, and bring to a boil. Cover, reduce heat, and cook for 5 minutes. Drain the liquid, transfer the cooked cauliflower rice to a bowl, and leave to cool in the freezer for 10 minutes.
    • Remove the chilled cauliflower rice from the freezer, transfer it to a bag of nut milk, gauze or the center of a thin dish towel, and squeeze the rice with your hands, removing all the excess moisture from the cauliflower.
    • Place the drained cauliflower in a large bowl, then add the flax mixture, ground almonds, garlic, onion powder, and dried parsley.
    • Stir well to mix well, then squeeze the mixture into the baking sheet covered with parchment. Shape the crust into the desired size with a slanted spatula or your hands, keeping the crust about ¼-inch (8 mm) thick. For best results, press firmly on the crust, ensuring that there are no "thin spots," still remembering to make the center slightly thinner than the sides.
    • Place the crust in the oven. Bake for about 30-40 minutes until the top is lightly browned and dry to the touch.
    • To flip the whole pizza crust, preferably use an extra piece of parchment paper on top, then flip it into the baking sheet without the parchment paper to cook for an additional 15 minutes or until it is dry.
    • Add your favorite pizza toppings and return briefly to the oven to let it heat up about 5-10 minutes extra.

    Notes

    • To save time, you can put almond flour already prepared.
    • To spread the pizza crust, I like to use a slanted spatula. If you don't have this utensil, use a rubber spatula.
    • Don't forget to keep edges a little thicker than the middle. This allows the center of the dough to cook faster.
    • Make sure you drain the moisture first as much as possible.
    • Use parchment paper on top of the crust to help you turn it more easily.

    Nutrition

    Calories: 550kcal | Carbohydrates: 42g | Protein: 25g | Fat: 38g | Saturated Fat: 3g | Polyunsaturated Fat: 6g | Monounsaturated Fat: 2g | Sodium: 1311mg | Potassium: 1556mg | Fiber: 21g | Sugar: 11g | Vitamin A: 1IU | Vitamin C: 219mg | Calcium: 280mg | Iron: 5mg

    Banging No-Bake Brownies with Salted Caramel

    Jun 11, 2018 · Leave a Comment

    Brownies come in many guises.

    You can find them with nuts or without, topped with butterscotch caramel, or swirled with cream cheese. You can experience them shot with fruit filling. And if you’re feeling adventurous and want to go on a trip around the world, you can munch on them spiked with espresso, booze, or marijuana.

    Or you can enjoy just plain chocolate in a ton of variations.

    But for true brownie lovers, the most important feature of a brownie is texture.

    And the brownies I’ll be sharing with you offer just that: amazing texture. They’re actually no-bake brownies.

    The kicker? They're healthy.

    3 squared brownies stacked on each other with caramel cream and strawberries on top.
    No-Bake Brownies

    I was supposed to post this recipe for Mother’s Day, but I missed the date.

    But for me, Mother’s Day is every day. If, like me, you believe it should be a yearlong celebration and therefore, you can’t get over your brownie fix, I’ve got something that you’ll certainly enjoy guilt-free.

    Better Ingredients for Better Brownies

    These brownies are entirely raw (or at least 98 % of them) and they come with only 5 ingredients. Five high-quality ingredients at that. You’ve got walnuts, Medjool dates, raw cacao, vanilla, and dried cherries, which are way healthier ingredients than what you would find in traditional-style brownies (like crazy refined sugar and other ones I don’t want to think about).

    The first three are nutrient rich.

    Walnuts from whole to ground

    Walnuts: Rich in omega-3 essential fatty acids — essential because your body can’t make them, so they must come from the food you eat —, walnuts help reduce cholesterol, lower the risk of heart attack and stroke, boost your immune system, improve brain function, and relieve symptoms of inflammatory conditions such as arthritis. (Source)

    Medjool dates: Although dates taste more like caramel — which is not a bad thing — they make an excellent alternative for sugar or honey. Yes, they do contain a significant amount of fruit sugar, but they also contain fiber, which slows the absorption of sugar and keeps you from getting sugar highs and lows. Dates are also a good source of potassium, magnesium, copper, and manganese.

    Medjool dates are more tender, versatile and larger than regular dates. That’s why they’re used in this recipe. I know they tend to be more expensive, so you can use the regular ones. But you’ll have to double the quantity, though (1 Medjool date = 2 regular dates). (Note: I used apricots originally.)

    Raw cacao: This superfood is one of the best sources of magnesium found in nature. Magnesium helps with the contraction of muscles, your heart, your digestive tract (to push the ingested food bolus toward the stomach), and more.

    Cacao contains high amounts of calcium, zinc, iron, copper, sulfur, and potassium, as well as many chemicals that enhance physical and mental well-being. Yep, the serotonin, dopamine, endorphins, and anandamide will surely propel you to heaven.

    Close-up of brownie dough in a food processor bowl with a spoon of vanilla on the verge of being added
    No-Bake Brownies Dough

    From a confection standpoint, when making these perfect brownies, for fudge-like brownies, it’s important to process the « batter » long enough to get the rich dark brown color and add a little water for moisture.

    Surprisingly Delicious Traditional-Style Brownies

    A bowl of a brownie dough being held by a dark-skinned hands
    Mixing the brownie dough

    Ooey and gooey, this treat oozes with chocolaty goodness. I learned this recipe from the raw food school I went to. It includes chopped walnuts for crunch and dried cherries for even more gooeyness.

    But I didn’t just stop there. I wanted to go full-blown gourmet, so I poured homemade date caramel on top for a second layer. Oh. My. Gawd. It’s something!

    At first, I did the caramel with macadamia nuts and dried apricots (all photos feature apricot caramel). But I found that making them with dates instead is crazy delicious, as the caramel flavor is intensified and the color is darker. It also includes a little bit of maca for a burnt flavor. I usually give this whole recipe to people who follow my Gourmet Plant-Based Food Workshop at home, but I’m gonna share with you! Aren’t you lucky!

    A close-up of dried apricots, macadamia nuts, and maca in a food processor bowl
    Raw caramel ingredients: dried apricots, macadamia nuts, and maca

    Anyway, going back to the brownies, you’ll be surprised how much they taste like REAL BROWNIES! Mind you, this recipe is made purely from nuts, so it ain’t cheap.

    But it lasts quite a while and can be served in small portions. In very small portions. Because they’re incredibly satisfying. One bite, and you’ll be done.

    All in all, these raw, no-bake brownies are rich, dense, fudgy, chewy, gooey, and simple to make.

    Brownie dough in a rectangular baking pan
    Raw brownies

    Plus, they’re gluten-free, egg-free, dairy-free, soy-free, and vegan. They're naturally sweetened, there’s no oven required, and they take about 20 minutes to put together. They’re best enjoyed straight from the freezer.

    You can also refrigerate these brownies for a few weeks, or you can freeze them for up to 2 months or more. But I’ll be surprised if they last that long. You can add chocolate ganache instead of the raw caramel, coarsely chopped nuts on top (pistachios or whatnot), and whatever rocks your boat.

    Making these brownies is a fantastic option for a bake sale or a gourmet gift.

    Now that you know all the brownie goodness, shall we?

    Make this Now

    Sometimes, you just really need a brownie! You’ve got the perfect recipe to satisfy your chocolate cravings. With these ingredients which are good for the body and the mind, you definitely won’t be sorry as you bite into bliss!

    Raw Brownies with Salted Caramel

    3 squared brownies stacked on each other with caramel cream and strawberries on top.
    Raw brownies with salted caramel

    If you try this recipe, I want to know about it! I always appreciate your feedback. Leave a star rating in the recipe card right below and/or a review in the comment section further down the page. You can also follow me on Pinterest, Facebook, or Instagram. Sign up for my email list, too!

    Print Recipe
    5 from 1 vote

    No-Bake Brownies with Salted Caramel

    Simple, raw vegan, gluten-free brownies layered with raw salted caramel. This layer is optional but will send you to cloud 9, thanks to its fudgy, decadent finish. A healthier and guilt-free dessert!
    Prep Time30 minutes mins
    Cook Time0 minutes mins
    Total Time30 minutes mins
    Course: Dessert, Snack
    Cuisine: Raw/No-Bake
    Keyword: maca, Medjool dates, walnuts
    Servings: 16
    Calories: 298kcal
    Author: Naïby

    Ingredients

    • 3 cups walnuts preferably soaked and dehydrated
    • ¼ teaspoon sea salt
    • 20 Medjool dates or 40 small regular dates, pitted
    • ⅔ cup cocoa powder unsweetened, raw chocolate powder, or carob powder
    • 1 teaspoon vanilla extract (Optional)
    • 4 teaspoons water
    • ¼ cup dried cherries or figs, chopped (Optional)

    Salted Raw Caramel

    • ½ cup dates or apricots soaked in water for 1 hour
    • ¼ - ½ cup macadamia nuts
    • ½ cup maple syrup
    • 1 teaspoon maca
    • Pinch salt
    Get Recipe Ingredients

    Instructions

    • Chop ½ cup of the walnuts with a knife and set aside. Place the remaining walnuts and the salt in a food processor fitted with the "S" blade and process until finely ground. Add the dates and process until the mixture begins to stick together. Add the cacao powder and optional vanilla and process until evenly distributed. Add the water, if using, and process briefly.
    • Transfer to a mixing bowl. Add the reserved chopped walnuts and cherries or figs, if desired, and mix well using your hands. Pack the mixture firmly into a square container.
    • Make the raw caramel. Blend all the ingredients in a high-powered blender until smooth. Thin with soaking water if desired.

    Notes

    Stored in a sealed container, Brownies will keep up to one week in the refrigerator or one month in the freezer; the same with Salted Caramel.

    Nutrition

    Calories: 298kcal | Carbohydrates: 40g | Protein: 5g | Fat: 16g | Saturated Fat: 2g | Polyunsaturated Fat: 10g | Monounsaturated Fat: 3g | Sodium: 39mg | Potassium: 422mg | Fiber: 5g | Sugar: 31g | Vitamin A: 117IU | Vitamin C: 1mg | Calcium: 62mg | Iron: 2mg

    Get Your Free Plant-Based Eating Toolkit and More

    Subscribe to my newsletter and unlock my plant-based course, nutrition charts, recipe secrets, and exclusive updates to prepare wholesome, varied & balanced meals effortlessly. All you need is a good appetite. Subscribe!

    Smiling girl with big afro sitting cross-legged on a sofa

    Hi there!

    I'm on a mission to help you get nutrient-dense, easy, and mouthwatering plant-based recipe ideas so you can feel stimulated, well-equipped, and confident to eat and cook better.

    Learn more about me →

    Between Seasons Spinach Cranberry Salad with Toasted Sesame Vinaigrette

    Jun 6, 2018 · Leave a Comment

    Spinach salad with sliced avocado and cranberry with poppy seeds vinaigrette

    Yep! So far I’m satisfied with how spring is going! Lovely buds, tulips, sunshine…. And asparagus, asparagus, asparagus... Are you excited? I am.

    Cranberry spinach salad in a white bowl
    Cranberry spinach salad

    Well, I have to admit, it wasn’t so nice in the beginning. Not in my part of town, anyway.

    We’ve had some weird weather. Below zero temperatures (in Celsius so for you it’s below 32° F), cloudy skies, and freezing rain! Yeah, freezing rain in mid-April! Crazy!

    So no matter how much I wanted to celebrate it, I just couldn’t because it felt like winter.

    Anyway, to embody this weird climate, I created this recipe — that, oh! gosh! I wanted to post in April. In this recipe, I mixed ingredients that normally characterize both seasons: cranberries (= winter) and asparagus (= spring) in a green salad! Sorry, I know the cold weather is really far behind you. This can still be a spring or even a summer recipe.

    So I bring you my cranberry spinach salad recipe. I must say the results were astounding. I created a fresh salad that I’m sure will bring more warmth to your hearts.

    2 Little Things That Will Give You The Best Finishing Touches on this Spinach Salad

    What makes this cranberry spinach salad special is the toasted nuts and seeds and the raw asparagus (yes, raw, you’ll see what I mean in a minute).

    Let’s start with the toasted nuts and seeds. When I got ready to prepare it, I thought of toasting them both together to save some time, cuz you know, we’re all busy and all.

    But that would’ve been a big mistake. Surprisingly, I learned that the sesame seeds brown quicker than the almonds. Sesame seeds take about 3-5 min to do so whereas almonds take about 8 minutes.

    So don’t try to outsmart them. Toast the almonds in the oven on a cookie/baking sheet first, then toast the sesame seeds in a skillet.

    Another important thing! This salad includes raw asparagus. Not in full form, oh, no! That would taste… odd, maybe. They’re in ribbons and their taste is more subtle this way.

    A bird's eye view of shaved asparagus in ribbons with a vegetable peeler on top of a narrow wooden cutting board
    Shaved asparagus

    So you’ll need to have a good vegetable peeler. Well, one that fits perfectly for the job.

    Usually, I use a Y-head vegetable peeler for everything. I’m so happy with it, jump-up-the-ceiling happy that I could bring this baby anywhere I go and tell people how much my peeler is the bomb.

    But unfortunately, it didn’t work so well when it came down to shaving the asparagus. In the beginning, it worked great but as I getting to a lower level, I had a hard time. I don’t think it was the peeler per se, but the tips that hold the blade. You see, these are a little bit more prominent, meaning they’re not at the same level as the blade, consequently, they stop you from shaving when the asparagus gets thinner.

    So you might want to use a swivel peeler for this job. Or maybe not cuz it might give you the same problem. But use one that has tips that are the same level as the blade, if that exists.

    Or, I have a trick for you: put the thinned asparagus on the narrower side of a small wooden cutting board and do your thang!

    Asparagus in ribbons
    Shaved asparagus

    A High-Protein Salad with Toasted Crunchy Goodness

    So like I said, you know spring is all about asparagus, right? I just had to post an asparagus recipe on the blog before the end of the season.

    I remember creating a couple of years ago a salad with asparagus that I really loved. It involved a super yummy dressing with Dijon mustard and nutritional yeast.

    I know Dijon goes well with asparagus and so I knew I’d have a clear winner.

    I wanted to make a salad that would be a filling and uber nutritious. The cranberry spinach salads I saw online were drenched in vegetable oil and white sugar. What’s the point of eating healthy if you’re going be adding these two high-calorie ingredients? Might as well buy a salad dressing from Kraft.

    So to make this salad healthier, I replaced these two bad guys with better alternatives.

    I replaced the white sugar with honey (you can use agave nectar as well for the vegan version) — mind you, sugar is sugar no matter the source; there’s no healthy sugar. But if you’re going to be using sugar, choose the lesser evil, mmmokay?

    And I replaced the vegetable oil with olive oil. I thought of doing half olive and half flaxseed oil to add a good source of omega 3s, but I decided to keep it simple in the end. Flaxseed oil also has this subtle peculiar nutty taste, which I thought might not work with this salad. But go ahead if you want. Flaxseed oil is amazing.

    To make it a filling salad, I added plant protein sources, like poppy seeds, sesame seeds, hemp seeds, and almonds. These also bring good fat. I added avocado, another good fat.

    The toasted sesame seeds bring warmth to the salad. I initially wanted to add them to the salad dressing but I ended sprinkling them on top of the salad. Oh! Oh! Can I talk to you about the dressing? It's simply the bomb, OMG. The nutritional yeast brings roundness and the Dijon, well, who doesn’t love Dijon?

    Spinach salad with sliced avocados and cranberries
    Cranberry spinach salad

    The cranberries bring the sweetness and chewiness and add a beautiful color contrast to the salad. The toasted almonds bring some crunch. This salad’s got the perfect blend of sweet + savory + toasted crunchy goodness and you’ll love every last bite of it.

    As you can see, I used many types of seeds (poppy, sesame, hemp) to add protein sources, but you don’t have to. You can remove the poppy seeds if you want to — their flavor is really subtle or non-detectable, really. You might find it too crunchy for your taste, so it’s really up to you. You can also replace the hemp seeds with savory tempeh, sliced or cubed, on top of the salad. There are so many ways you can play around with this salad.

    Last but not least, there’s no particular order in which you add the seeds. They can be added to the salad before pouring the salad dressing, mixed in with the salad dressing, or sprinkled on top at the end. And to save a few steps, you can use store-bought toasted sesame seeds and non-toasted sliced almonds.

    But you’ll be missing out, though! For sure!

    Make this Now

    Sometimes, you might be looking for something fresh that brings you a lot of warmth. This salad is perfect for that.

    Prepare the star ingredients properly, the toasted seeds and nuts and the shaved asparagus, and you’ll have a killer meal.

    And you’ll also have a filling salad that will satisfy all your nutritional needs.

    So bring up the heat, concoct a banging salad dressing, and make your spinach salad taste better than ever before.

    Cranberry Spinach Salad

    Spinach salad with avocados and slivered almonds
    Cranberry spinach salad

    If you try this recipe, I want to know about it! I always appreciate your feedback. Leave a star rating in the recipe card right below and/or a review in the comment section further down the page. You can also follow me on Pinterest, Facebook, or Instagram. Sign up for my email list, too!

    Spinach salad with sliced avocado and cranberry with poppy seeds vinaigrette
    Print Recipe
    5 from 1 vote

    Spinach Cranberry Salad with Toasted Sesame Vinaigrette

    This Between Seasons Salad offers the best of both worlds with spring’s harvest of asparagus and fall/winter’s favorites berries — cranberries.
    Prep Time30 minutes mins
    Cook Time0 minutes mins
    Total Time30 minutes mins
    Course: Salad
    Cuisine: American, Canadian
    Keyword: avocado, cranberries
    Servings: 4
    Calories: 429kcal
    Author: Naïby

    Ingredients

    • 8-10 cups spinach
    • 1 bunch asparagus cut into ribbons
    • ½ cup cranberries
    • 2 tablespoons shallots or onions minced
    • 1 avocado sliced
    • 2 tablespoons hemp seeds Optional
    • ¼ cup almonds toasted and slivered (Notes)

    Salad dressing

    • ¼ cup extra-virgin olive
    • ¼ cup lemon juice
    • 2 tablespoons honey or agave syrup
    • 1 tablespoon Dijon mustard
    • 2 teaspoons nutritional yeast
    • ½ teaspoon garlic (about 1 clove)
    • Salt to taste
    • 2 tablespoons toasted sesame seeds (Notes)
    • 2 tablespoons poppy seeds (Optional)
    Get Recipe Ingredients

    Instructions

    • Make the salad dressing: In a small blender or hand blender, blend together the olive oil, lemon juice, honey, dijon, nutritional yeast, garlic, and salt until smooth. Stir in the sesame seeds and optional poppy seeds until mixture is well blended. Set aside.
    • For the salad, add the spinach, asparagus, almonds, cranberries, shallots, and optional hemp seeds to a salad bowl. Drizzle dressing over salad and toss. Add avocado and toss gently. Serve immediately.

    Notes

    If the nuts and seeds are in their natural state, put the sesame seeds on a skillet and toast for 3-5 minutes, stirring occasionally. Put the slivered almonds on a baking sheet and toast for 8 minutes.

    Nutrition

    Calories: 429kcal | Carbohydrates: 28g | Protein: 12g | Fat: 33g | Saturated Fat: 4g | Polyunsaturated Fat: 8g | Monounsaturated Fat: 19g | Trans Fat: 1g | Sodium: 99mg | Potassium: 995mg | Fiber: 11g | Sugar: 13g | Vitamin A: 6601IU | Vitamin C: 36mg | Calcium: 238mg | Iron: 7mg

    Get Your Free Plant-Based Eating Toolkit and More

    Subscribe to my newsletter and unlock my plant-based course, nutrition charts, recipe secrets, and exclusive updates to prepare wholesome, varied & balanced meals effortlessly. All you need is a good appetite. Subscribe!

    Smiling girl with big afro sitting cross-legged on a sofa

    Hi there!

    I'm on a mission to help you get nutrient-dense, easy, and mouthwatering plant-based recipe ideas so you can feel stimulated, well-equipped, and confident to eat and cook better.

    Learn more about me →

    Mind-Blowing Low-Calorie Pulled Jackfruit Burritos

    Mar 8, 2018 · Leave a Comment

    I don’t know how it came to me.

    Suddenly, I wanted to make a gluten-free burrito. Not just any gluten-free burrito. A very low-calorie burrito with a grain-free tortilla and… jackfruit!

    Jackfruit Burrito wrapped in collard leaf lying on a thin wooden cutting board with newspaper as a background
    Pulled Jackfruit Burritos

    Every Wednesday or most Wednesdays anyway, it's Mexican night. We usually have a vegan chili but my son gets tired of it. He’s like: (Yawn) Boring! To be honest, sometimes I get tired of it too.

    So I looked for inspiration because I never had jackfruit before and I had to do something with it because that mysterious thing was calling me like my son does every so often...

    — Mommy?

    — (No reply. I'm probably in my head like usual.)

    — Mommy?

    — (No reply. I'm still somewhere in dreamland but hearing a distant voice.)

    — Mommy?!

    (Bubble popped. I'm falling back to earth.)

    — WHHAAAT!

    That's right! Lately, I’ve been seeing jackfruit everywhere. I saw it on social media, a friend of mine mentioned it, and at the grocery store, there it was staring at me in a can, beautifully packaged in bright white and green colors with decorative Indian-style patterns. I’d never noticed it before, but there it was. The time had come for me to play with it.

    So I did and I came up with a ridiculously delicious, marvelous, to-die-for healthy burrito. I’m not kidding. Don’t be fooled by the fact that it doesn’t contain any grain tortilla. It got me singing Alicia Keys’ chorus like this: That thing is on fire!

    Do you want a piece of it? I thought you’d never ask.

    How to Replace Grain Bread Products

    Remember I told how I wanted a low-calorie burrito? Well, last week I was curious to weigh myself and to my astonishment, I gained almost 10 pounds! Ok, if you saw me, you’d be like: "Shut up!" because I look thin.

    But still, I noticed I’ve been gaining weight slowly for the past year, especially these last five, six months. In those months, I think I gained 6 pounds or something. I’m blaming it on the crazy hours I’ve been putting in to launch this blog and get it in front of the eyes of others, and sitting in front of my computer for hours on end and snacking on nuts and seeds repeatedly.

    I may look somewhat thin, but I have to put a stop to this madness before I wake up one day and see Willy the Whale as my reflection. Ok, I might be exaggerating, but I want to be able to see my toenails. Is that too much to ask? So for the first time in my life, I decided to go on a super healthy regimen: stop munching too much, work out and have more sex. What!? That's more exercise, isn't it?

    Anyway, let's get back to the subject. The easiest solution for grain-free (or cereal-free) bread products is to use green leaves, like a lettuce leaf or cabbage leaf — sometimes softened in warm water. They work great for one-bun burgers, one-slice sandwiches, tacos, and burritos/tortillas. Remember this, my friend:

    When replacing lifeless beige bread, use lively green leaves.

    Close-up of different types of leaves: collard leaves, cabbage leaves, and lettuce leaves

    Beep! I’m interrupting this message with this trivia…

    Do you know the difference between enchiladas and burritos? The type of tortilla, the serving method, and the size characterize them. Essentially, enchiladas are made with a corn tortilla and come with some type of sauce. Burritos, which are usually larger, are made with a flour tortilla.

    In my case, I'm using neither a flour tortilla nor a corn tortilla. Mine is a leafy wrap. (Hum… maybe I should’ve called my recipe Pulled Jackfruit Garden Wraps, but would you have been attracted to the title?)

    The Perfect Weapon to Fool Meat Eaters

    Shredded jackfruit in a white bowl
    Shredded Jackfruit

    I never paid attention to jackfruit until very recently. Jackfruit is gaining a lot of popularity lately. The reason is it can be used as a great substitute for dishes that call for pulled pork or chicken, thanks to its fibrous texture.

    Of course, jackfruit won't taste anything like meat. It tastes more like a mix of banana, mango, and pineapple. But the texture? Woah, I'm telling you, meat eaters will be definitely tricked. Ok, great but how to prepare it?

    Internet to my rescue! I looked up jackfruit recipes and when compared, I noticed that most of them contained some kind of paprika, chili powder, and/or tomato paste — all red ingredients. Ahhh! And then I had an epiphany! These are all used to color the jackfruit! There you go, another trick to imitate meat's color.

    A Lighter Burrito: Cutting Calories and Steps

    My inspiration for my low-calorie burrito all started with an enchilada recipe I learned how to make in raw food cuisine. It contained a raw corn tortilla, a chile Colorado sauce, and different ingredients for the filling.

    There was no way in hell I was going to make the raw corn tortilla because it involved making a veggie batter that had to dehydrate for 8 to 12 hours. So I had to think of something else.

    My wrap of choice was collard leaf. Now I had two things covered, the wrap and the chili sauce (or so I thought). For the filling, in the beginning, I wanted black beans, corn, shredded cabbage, salsa, sliced avocado, and jackfruit. And the idea was to slap the chile Colorado sauce onto the leaf then add the filling's ingredients.

    But I had a few setbacks.

    First of all, to make the chili Colorado sauce, I needed dried red California chilis. But from all the varieties of chili packages pinned on the wall at my favorite ethnic grocery store, I couldn’t find any. A quick search online pointed that I could replace California chilis (aka Anaheim chilis) with canned green chilis or fresh Poblano chilis. The grocery store only had the latter so I used that. Second, when I made my sauce, it was too liquid! I could just imagine the sauce dripping constantly out of the wraps. Not too pretty.

    So I decided to use the sauce for the jackfruit but also make guacamole — a way thicker and more solid consistency — to lie in between the collard leaf and the filling.

    Third, preparing the shredded cabbage and salsa was going to involve too many steps. So I skipped them altogether. Actually, I replaced the grated cabbage for a bag of frozen corn that had been getting a cryogenic treatment like Walt Disney for months and was waiting for its revival... I also thought corn would add a nice bright color to the brown cooked beans and jackfruit. And finally, I used plain cubed tomatoes instead of freshly-made salsa to give you some mercy and topped the filling with lime juice and cilantro leaves.

    • Pulled jackfruit and Caribbean black beans
    • Shaved collard Leaf
    • Jackfruit Burrito ingredients
    Main ingredients to make pulled jackfruit burrito

    As you can see, you can play around with the filling. If you want to go the lazy route, you can use whole wheat or gluten-free tortillas and ready-made guacamole (or simply mashed avocados) and/or salsa. You can add mangoes, more leafy greens, green onions, whatever you like. You can serve the seasoned jackfruit in sandwiches, tacos, or nachos or make a jackfruit bowl.

    My wrap is dope though. It’s light, slightly crunchy, slightly tangy, slightly hot, uber savory, satisfying, and comforting. What's not to love?

    Make it Now

    Burritos are always fun to make and are perfect for cool gatherings. This recipe might take four big major steps because you’re preparing everything from scratch, but even when you build traditional tortillas, it still involves many components.

    The freshness of the ingredients makes it so worth it, though.

    Pulled Jackfruit Garden Wrap

    If you try this recipe, I want to know about it! I always appreciate your feedback. Leave a star rating in the recipe card right below and/or a review in the comment section further down the page. You can also follow me on Pinterest, Facebook, or Instagram. Sign up for my email list, too!

    Print Recipe
    5 from 1 vote

    Pulled Jackfruit Burritos

    Burritos are always fun to make and are perfect for cool gatherings. This recipe might take four big major steps because you’re preparing everything from scratch, but even when you build traditional tortillas, it still involves many components.
    The freshness of the ingredients makes it so worth it, though.
    Cook Time45 minutes mins
    Total Time45 minutes mins
    Course: Main
    Cuisine: American, Mexican
    Keyword: black beans, red bell pepper
    Servings: 4
    Calories: 364kcal
    Author: Naïby

    Ingredients

    Chile sauce

    • 2 Poblano chilis fresh or dried California chilis stemmed and seeded (Notes)
    • 1 red bell pepper seeded and chopped
    • 2 teaspoons onion powder
    • 1 teaspoon Mexican chili powder
    • 1 teaspoon smoked paprika
    • 1 teaspoon garlic powder
    • 1 teaspoon ground cumin
    • ½ teaspoon salt
    • ¼ teaspoon dried oregano
    • ¼ teaspoon pepper
    • 1 tablespoon olive oil
    • 1 20 oz-can green jackfruit in brine or water
    • 1 teaspoon olive oil
    • Salt to taste

    Caribbean Black Beans

    • 1 teaspoon oil
    • ½ cup chopped onion
    • 4 cloves garlic finely chopped
    • 1 ½ cups black beans cooked or 2 x 15 oz-can (Notes)
    • 1 cups Roma tomatoes diced
    • 1 tablespoon apple cider vinegar
    • ½ teaspoon thyme
    • ½ teaspoon salt
    • ⅛ teaspoon Cayenne pepper

    Guacamole

    • 2 ripe avocados
    • 2 tablespoons red onions minced
    • 2 teaspoons lime juice
    • 1 teaspoon garlic crushed (about 1 clove)
    • Pinch salt
    • Pinch Cayenne pepper

    Garnish

    • Diced tomatoes or salsa
    • ½ cup minced cilantro
    • 1 lime cut into wedges
    • 4-6 large collard leaves shaved and stem removed
    Get Recipe Ingredients

    Instructions

    • Make the sauce: In a high-powered blender, place the chilis with the remain ingredients, except the olive oil, and blend until completely smooth. Add the olive oil and continue blending until emulsified. Set aside.
    • Drain and rinse the jackfruit. Squeeze out excess liquid by pressing the jackfruit pieces in a paper towel. Slice jackfruit into thin, ¼-inch thick strips using a small knife, from core to edge, or shred in a food processor.
    • Heat 1 teaspoon oil in a skillet over medium heat. Add shredded jackfruit and cook for 2-3 min. Add the sauce and ¼ cup water. Cook partially covered for 25 to 30 minutes. Stir occasionally. Once the mixture is dry, salt to taste.
    • Make the Caribbean black beans: Heat oil in a skillet over medium heat. Add onions and garlic and cook until translucent for 4-5 min. Add the black beans and the remaining ingredients, and simmer for 10 min. Stir occasionally.
    • To assemble: Spread the guacamole onto the collard leaf. In rows, add the black beans, corn, tomatoes, and jackfruit. Drizzle the filling with lime juice from a wedge and sprinkle with cilantro. Fold each extremity of the collard leaf perpendicularly to the rows of the filling and roll the free extremities into a burrito. Cut in half and secure each half with a toothpick.
    • Served immediately.

    Notes

    If using dried chilis, in a medium bowl, cut into pieces and discard seeds. Soak for 30 minutes then drain. If using dried black beans, soak overnight and cook the night before or the day of the recipe. Cook for about 45 minutes.
    Placed in a tight container in the refrigerator, the wraps will keep for a day, the blacks beans for a week and the jackfruit for 5 days.

    Nutrition

    Calories: 364kcal | Carbohydrates: 39g | Protein: 11g | Fat: 21g | Saturated Fat: 3g | Polyunsaturated Fat: 3g | Monounsaturated Fat: 14g | Trans Fat: 1g | Sodium: 611mg | Potassium: 1185mg | Fiber: 17g | Sugar: 7g | Vitamin A: 2884IU | Vitamin C: 117mg | Calcium: 103mg | Iron: 3mg

    Get Your Free Plant-Based Eating Toolkit and More

    Subscribe to my newsletter and unlock my plant-based course, nutrition charts, recipe secrets, and exclusive updates to prepare wholesome, varied & balanced meals effortlessly. All you need is a good appetite. Subscribe!

    Smiling girl with big afro sitting cross-legged on a sofa

    Hi there!

    I'm on a mission to help you get nutrient-dense, easy, and mouthwatering plant-based recipe ideas so you can feel stimulated, well-equipped, and confident to eat and cook better.

    Learn more about me →

    Vibrant Quinoa Salad with Beets, Oranges and Walnuts

    Feb 1, 2018 · Leave a Comment

    Do you have a quinoa recipe that is always a winner? One that whenever you make it, people always rave about it?

    I have one. It's made with mango, red bell peppers with a cumin-lemon sauce. It never fails. Every time I make it, people ask me for the recipe. One day, I'll post it.

    But tell me, do you sometimes get tired of making that same winner recipe? I do. That's why I didn't feel like sharing it now :P. I wanted to make something different.

    One thing is for sure, though, I never get tired of making quinoa salads. They're so easy to make and so filling.

    Top view of Quinoa Salad with Beets, Oranges and Walnuts in a rustic metallic plate
    Quinoa Salad with Beets, Oranges and Walnuts

    If you're running out of ideas with your quinoa salads, I have just the right one that'll stir things up a little.

    This one is made with fresh ingredients like beets and oranges, which make winter meals look so inviting.

    Bloody Beets: The Things You'll Do to Avoid Stains

    Diced cooked beets on a cutting board
    Bloody beets

    There's no way around it. Beets will stain everything they touch when boiled.

    When I thought about making this recipe, I tried to come up with all the ways I could mix the cubed beets into the quinoa salad without it turning purple.

    First, I thought I could let the water run on the beets or put them in ice water. Then I thought I should coat them with oil. I tested these different methods with a small sample and none of them worked.

    When I dug further, I learned that the best way would've been to bake them in the oven. You wrap them in foil and bake them for about 40 min or more, depending on their size. Then you uncover them, let cool, and run cold running water on them while you peel off the skin. You can tell I'm no beet expert.

    When I found out about this, it was too late. The beets were already plunged into hot water, boiling away. Eh.. I'll try it next time.

    As for your hands, if you don't want to have any trace of their color, use gloves when you peel them. But if you don't use gloves, don't worry, the color will go away after a few washes.

    Anyway, since it was too late to try this no-stain experiment, I figured I would top the quinoa salad with the beets. There. No choice.

    Fragrant Combinations

    My basic formula for making a quinoa salad is this: cooked quinoa + fine herbs + sometimes fruits + sometimes nuts + dressing + seasoning.

    Top view of quinoa salad with beets, and walnuts. Clockwise: sliced oranges, cubed cooked beets, cumin seeds, basil leaves, walnuts on a metallic plate
    Quinoa Salad with Beets, Oranges, and Walnuts ingredients. Clockwise: sliced oranges, cubed cooked beets, cumin seeds, basil leaves, walnuts

    I had two heads of endives in my fridge and I thought it would be a great addition to the quinoa and beet salad. The endives would tone down the salad and bring some freshness.

    For the fresh herbs, my most used ones are usually parsley or cilantro, but I wanted something completely different. I could've used dill but I chose basil instead, which also compliments beets well. I was curious to taste the result.

    I found that the mix of the purple beets and the beige quinoa lacked cheerful color. So as a contrasting and vibrant color, I added oranges. Plus, oranges work perfectly with beets.

    I love cumin with quinoa. I usually grind the seeds and add them to a vinaigrette, but I remembered that once, I cooked the seeds until fragrant and added them in some recipe that I can't remember for the life of me! Augh, does this happen to you? Anyway, I thought it would be interesting to do this here.

    For the nuts, I chose walnuts. I don't know… there's something comforting about them. And I'm happy I used them. The salad wouldn't have been the same without them.

    If I wanted to bring the salad to a crazy yummy level I could've added some nut ricotta, but I wanted to keep things simple.

    Finally, for the dressing, I usually mix lemon juice with olive oil and I add garlic and salt. So that's what I did. Buuut for more sweetness, I added honey.

    This salad is so flavorful. I love the finishing touches with the beets, the oranges, and the walnuts. The oranges bring so much freshness to the salad and the beets are just, muah! so sweet and tasty. And finally, the walnuts brought lots of umami.

    So there you go. If you follow my quinoa salad formula, it's easy to change the ingredients whichever way you want it. You can eat this salad hot or cold, as is, or in a burrito. Have fun with it.

    Quinoa Salad with Beets, Oranges and Walnuts

    Quinoa Salad with Beets, Oranges and Walnuts in a rustic metallic plate with another plate of ingredients in a metallic plate behind
    Quinoa Salad with Beets, Oranges and Walnuts

    If you try this recipe, I want to know about it! I always appreciate your feedback. Leave a star rating in the recipe card right below and/or a review in the comment section further down the page. You can also follow me on Pinterest, Facebook, or Instagram. Sign up for my email list, too!

    Print Recipe
    5 from 1 vote

    Quinoa aux betteraves, aux oranges et aux noix

    Si tu manques d'idées avec tes salades de quinoa, en voici une faite avec des ingrédients frais comme les betteraves et les oranges, qui rendent les repas d'hiver si attrayants.
    Prep Time30 minutes mins
    Cook Time1 hour hr 30 minutes mins
    Total Time2 hours hrs
    Course: Principal
    Cuisine: Vegan
    Servings: 4
    Calories: 421kcal
    Author: Naïby

    Ingredients

    • 4 betteraves cuites
    • 1 botte de basilic haché (environ 2 tasses)
    • 1 ½ tasses de quinoa
    • 2 oranges
    • 2 têtes d'endives tranchées
    • 2 cuillères à café de cumin

    Dressing

    • 3 cuillères à soupe d'huile d'olive
    • 3 cuillères à soupe de jus de citron
    • 1 cuillères à soupe de miel ou de nectar d'agave
    • ½ cuillère à café d'ail écrasé (environ 1 gousse d'ail)
    • Sel et poivre au goût
    Get Recipe Ingredients

    Instructions

    • Porter une grande casserole à ébullition, ajouter les betteraves dans l'eau et faire bouillir pendant environ une heure jusqu'à ce qu'elles soient tendres à la fourchette. Alternativement, tu peux les envelopper individuellement dans du papier d'aluminium, les placer sur une plaque à pâtisserie et les rôtir au four pendant 40 à 70 min, jusqu'à ce qu'ils soient cuits. Retirer du feu et laisser refroidir. Peler la peau et couper en cubes d'environ 1 pouce. Transférer dans un petit bol. Ajouter ¼ tasse de basilic aux betteraves et mélanger.
    • Entre-temps, cuire le quinoa environ 15 minutes dans de l'eau salée. Porter à ébullition jusqu'à ce que l'eau atteigne la surface du quinoa, puis couvrir et cuire à feu doux. Transférer le quinoa dans un saladier.
    • À l'aide d'un couteau bien aiguisé, couper le haut et la queue des oranges. Coupez le côté de chaque orange, en suivant sa ligne naturelle, pour enlever la peau et la moelle blanche. Coupez chaque orange en coupes transversales.
    • Dans une casserole, à feu vif, cuire les graines de cumin jusqu'à ce qu'elles soient parfumées. Mélanger les graines dans le saladier de quinoa. Ajouter l'endive et le reste du basilic et bien mélanger.
    • Pour faire la vinaigrette, mélanger tous les ingrédients dans un petit bol et bien mélanger.
    • Verser 1 cuillère à soupe de vinaigrette sur le mélange betterave-basilic et bien mélanger. Versez le reste de la vinaigrette dans la salade de quinoa et mélangez bien.

    Nutrition

    Calories: 421kcal | Carbohydrates: 63g | Protein: 11g | Fat: 15g | Saturated Fat: 2g | Polyunsaturated Fat: 3g | Monounsaturated Fat: 9g | Sodium: 70mg | Potassium: 840mg | Fiber: 9g | Sugar: 16g | Vitamin A: 310IU | Vitamin C: 45mg | Calcium: 89mg | Iron: 5mg

    Get Your Free Plant-Based Eating Toolkit and More

    Subscribe to my newsletter and unlock my plant-based course, nutrition charts, recipe secrets, and exclusive updates to prepare wholesome, varied & balanced meals effortlessly. All you need is a good appetite. Subscribe!

    Smiling girl with big afro sitting cross-legged on a sofa

    Hi there!

    I'm on a mission to help you get nutrient-dense, easy, and mouthwatering plant-based recipe ideas so you can feel stimulated, well-equipped, and confident to eat and cook better.

    Learn more about me →

    Rainbow Thai Salad with Mock Peanut Sauce

    Jan 2, 2018 · Leave a Comment

    This Thai salad is colorful, crisp, and eclectic. And it's very, very succulent. So much so that you'll want to eat it every day. How so? It has all these magical ingredients!

    Thai salad in a big white bowl
    Thai salad with mock peanut sauce

    The Golden Rules for Creating an Appetizing Salad

    Let's be honest.

    How many times have you been served salads that were, well, boring?

    Salads, made of crumbled Iceberg lettuce leaves with sliced tomatoes or shredded carrots, drowning in a Kraft vinaigrette. Ugh! So sad!

    And you force yourself to eat these boring salads because they’re healthy.

    But even if they are, you don’t enjoy them. They’re just not mouthwatering.

    You may have heard of those rare fanatics who love salads and eat them every day. What motivates them so much? What should you do to be like them?

    Well, I'll tell you.

    You have to be creative enough to make your salads to die for.

    Often, salads are not attractive because they lack elements to stimulate all your senses: sight, smell, hearing, touch, and taste.

    In order to do this, you have to play on three types of contrasts:

    • Colors: first impressions count and we eat with our eyes! Choose invigorating colors — dark green leaves and ingredients with warm and often saturated colors (orange, red, purple ...). You can add lighter colors (the light green of cucumber or green apple or the beige of seeds and nuts) to bring another contrast. Add suggestive sensual elements (I'll talk about this in 30 seconds), which make you imagine what you'll feel once you take a bite.
    • Textures: textures are the second sensation you feel. Crunchy textures are always more interesting than soft ones, so choose fresh ingredients. For the salad dressing, keep the textures flowing and creamy (hint: these are the sensual elements I talked to you about earlier). You can also add juicy fruits and vegetables (cucumber, red pepper, or tomato) for a liquid explosion.
    • Tastes: sweet and sour or sweet-salty flavors are very popular because they are stimulating. So do the same. Play with this contrast in your dishes: grated carrot + olives, lemon juice + maple syrup in salad dressings, bitter green leaves + sweet fruit, etc. These are just a few examples.

    In general, what many don’t know is the salad dressing is really what makes all the difference. So focus on that.

    For this salad, I also added an unusual crunchy food...

    Truly Fresh Noodles

    Every Monday night, at home, we have an Asian theme. And for some time, I was preparing vegetable sautéed with teriyaki sauce, accompanied by quinoa. This is not my adorable little monster’s favorite dish. So last weekend, I decided it was time to "modernize" it and add something that would make my salad irresistible to my son: noodles. Booyah!

    But not any noodles. Kelp noodles.

    Top view of kelp noodles on a black surface
    Kelp noodles

    This salad is mainly composed of greenery with lots of colorful vegetables, herbs, noodles, all topped with a creamy sauce. I opted for kelp noodles for the nutritious side.

    These seaweed noodles are crunchy and contain only 6 calories per serving if you want to lose weight. In addition to being gluten-free, raw and fat-free, they are also rich in minerals, including calcium (15% of daily intake). They require no cooking. Just rinse them and add them to your favorite recipe.

    But it’s also possible to put kelp noodles in hot water to soften them.

    You can find them in health food stores and, apparently, even in more conventional supermarkets such as Wal-Mart. If you can’t find it, brown rice vermicelli or legume-based noodles will do just fine.

    Also, if you have trouble making your cohort eat these new types of noodles, because they’re addicted to refined products, mix them with traditional noodles (put less of those, of course). As long as your beloved ones eat the rest, right? I know, it’s sneaky. But desperate times call for desperate measures.

    This salad takes at most 30 min and is very easy to do. It requires two steps: cutting the vegetables — with a mandolin or a peeler — then preparing the sauce.

    Top view of thai salad ingredients in a bowl. From left to right clockwise: spinach, red bell peppers, bok choy, red cabbage, cilantro, carrots in ribbons, and kelp noodles
    Thai salad ingredients. Clockwise: spinach, red bell peppers, bok choy, red cabbage, cilantro, carrots in ribbons, and kelp noodles

    The sauce is made from almond butter and not from peanut to avoid allergic reactions that some may have. But don’t hesitate to choose another nut butter of your choice.

    Top view of mock peanut sauce in a ramekin, garlic clove, lime cut in two, miso paste on a spoon, piece of ginger, and tamari in a tiny glass mixing bowl
    Mock peanut sauce

    Finally, if you want to add extra protein, add hemp seeds or edamame beans; for a more "meaty" effect, you can add tempeh.

    Anyway, I think you'll really like it. It’s super nutritious AND crispy AND tasty.

    Serve it as a starter or main dish. Eat it in a roll — made out of rice paper or a cabbage leaf. You have lots of variants to choose from.

    Thai Salad with Mock Peanut Sauce

    Thai salad in a bog white bowl with mock peanut sauce
    Thai salad with mock peanut sauce

    If you try this recipe, I want to know about it! I always appreciate your feedback. Leave a star rating in the recipe card right below and/or a review in the comment section further down the page. You can also follow me on Pinterest, Facebook, or Instagram. Sign up for my email list, too!

    Big thai salad in a while bowl
    Print Recipe
    5 from 1 vote

    Thai Salad with Mock Peanut Sauce

    This Thai salad is colorful, crisp, and eclectic. And it's very, very succulent. The sauce is made from almond butter and not from peanut to avoid allergic reactions that some may have. But don’t hesitate to choose another nut butter of your choice. Serve it as a starter or main dish. Eat it in a roll — made out of rice paper or a cabbage leaf. You have lots of variants to choose from.
    Prep Time25 minutes mins
    Cook Time0 minutes mins
    Total Time25 minutes mins
    Course: Salad
    Cuisine: Raw/No-Bake
    Keyword: bok choy, carrots
    Servings: 3 -4
    Calories: 462kcal
    Author: Naïby

    Ingredients

    Salad

    • 2 cups kelp noodles or rice vermicelli (340 g)
    • 2 carrots cut into ribbons or spirals with a spiral cutter
    • 2 green onions finely chopped
    • ¼ cup coriander chopped
    • ¼ cup mint chopped
    • 1 cup spinach chopped
    • 1 cup bok choy chopped
    • 1 cup red cabbage finely chopped
    • 1 red bell pepper finely chopped
    • ¼ cup sesame seeds

    "Peanut" sauce

    • ½ cup almond butter
    • ¼ cup water
    • 2 tablespoons lime juice
    • 3 tablespoons tamari
    • 2-3 tablespoons maple syrup
    • 1 clove garlic crushed (about ½ teaspoon)
    • ½ teaspoon grated fresh ginger
    • 1 teaspoon Thai chili paste or 1 minced Thai red chili or ¼ teaspoon of red chili flakes
    Get Recipe Ingredients

    Instructions

    • In a large salad bowl, add all the ingredients and mix well. Put aside.
    • To make the sauce, put the ingredients in a small blender or a small mixing bowl. Add the salad dressing and mix well. Sprinkle with sesame seeds and serve immediately.

    Notes

    This salad and the sauce alone will keep in the refrigerator for 5 days.

    Nutrition

    Calories: 462kcal | Carbohydrates: 43g | Protein: 14g | Fat: 30g | Saturated Fat: 3g | Polyunsaturated Fat: 9g | Monounsaturated Fat: 16g | Sodium: 124mg | Potassium: 967mg | Fiber: 12g | Sugar: 24g | Vitamin A: 10690IU | Vitamin C: 90mg | Calcium: 585mg | Iron: 6mg

    Get Your Free Plant-Based Eating Toolkit and More

    Subscribe to my newsletter and unlock my plant-based course, nutrition charts, recipe secrets, and exclusive updates to prepare wholesome, varied & balanced meals effortlessly. All you need is a good appetite. Subscribe!

    Smiling girl with big afro sitting cross-legged on a sofa

    Hi there!

    I'm on a mission to help you get nutrient-dense, easy, and mouthwatering plant-based recipe ideas so you can feel stimulated, well-equipped, and confident to eat and cook better.

    Learn more about me →

    Fresh, Fast and Lactose-Free Ricotta

    Jan 2, 2018 · Leave a Comment

    Cheese-looking round food with a on a salad plate with pomegranate arils next to it

    This lactose-free ricotta cheese is almost similar in texture and flavor to the real thing. And it's very easy to make.

    All you need are nuts as your main ingredient and a little of your imagination.

    Cheese-looking round food with a on a salad plate with pomegranate arils next to it
    Almond ricotta cheese

    Living without cheese... a difficult, if not an impossible task?

    If you talk to anyone who has made the transition to a vegan diet or is thinking about it, most of the time, that person will say that cheese is their weakness.

    This weakness can be so great that it causes some people to feel ecstatic when they eat it. They enjoy creamy Brie on a crispy baguette with apple slices and a glass of wine and… Mmmh! They’re on cloud 9!

    So, if you too are bewitched, it's not your fault. There’s something in cheese that makes you crave it.

    Why You’re Addicted to Cheese

    How can you ignore this exquisite treat? Its tangy flavor? Its creamy texture? How can you ignore all its interesting shapes? Sliced, saucy, crumbled... How can you forget your childhood memories or gourmet evenings with friends?

    For most people, cheese has so many varieties, each more sensual than the next, that they find it difficult to abstain from it, to eliminate it. Do you want to hear something crazy?

    Some have cheese cravings in the wee hours of the night. The wee hours of the night!!

    Want to know something? There’s a reason for this addiction. Because it is an addiction!

    Researchers have found that casein — a milk protein — breaks down into casomorphins during digestion, producing opiate effects, the same as heroin and morphine.

    According to Dr. Neal Barnard, Chair of the Physicians Committee for Responsible Medicine (PCRM):

    "Since cheese is transformed to express all the liquid, it is an incredible source of casomorphins. So to speak, it's dairy crack. In other words, cheese is a concentrate of casomorphins.”

    Ah! This explains the effect of this accentuated pleasure!

    Fall in Love with "Cheese" All Over Again

    I agree. Nut cheeses will never be comparable to real, dairy cheese.

    But the flavors of nut cheeses are just as sensual.

    And what’s great about nut cheeses is that you can create a myriad of varieties. It depends on the chosen nuts: almonds, cashews, macadamia nuts, hazelnuts (for a sweeter flavor)... As long as they have a high-fat content.

    In this recipe, I wanted to recreate some kind of ricotta.

    So I used almonds to replicate the same white color. For this, I had to peel them.

    Oh! Man! This took me way back to when I started the raw food diet. It reminded me of the pain I was going through the first time I prepared almond milk. Imagine! I would peel all the almonds beforehand.

    I didn’t know that it made no difference if I peeled them or not. I didn’t know it would change neither the color nor the taste of the milk.

    Fortunately, this time, peeling almonds was effortless.

    Once soaked or blanched, you can remove the skin very easily.

    The traditional ricotta recipe contains lemon juice. So I kept it in my dairy-free cheese version to make it tangy, which naturally results from the fermentation process. Then, since all cheeses are salty, I added a little salt too, and to give it taste, I added garlic.

    In short, making this almond lactose-free ricotta is very simple.

    Simply drain a mixture of creamy almond, previously processed in the food processor. Use a cheesecloth (or gauze) and apply a light pressure.

    My version is a quick version. To have even more nutrition, some ferment the whole thing. But I didn’t. If I wanted to do so, I would’ve used probiotics or a fermented ingredient, like Rejuvelac — a solution of fermented grains — or miso. This works great to accentuate the taste of cheese.

    Depending on the desired texture, you may decide to have a drier or wetter ricotta. This would depend on the dewatering time or applied pressure.

    Wetter ricotta can be added to pizzas, noodles, lasagna, or wraps, for example. Drier ricotta can be crumbled into salads or soups.

    So there you go! Let’s get to it!

    Quick Almond Ricotta

    Cheese-looking round food with a on a salad plate with pomegranate arils next to it
    Fromage ricotta aux amandes

    If you try this recipe, I want to know about it! I always appreciate your feedback. Leave a star rating in the recipe card right below and/or a review in the comment section further down the page. You can also follow me on Pinterest, Facebook, or Instagram. Sign up for my email list, too!

    Cheese-looking round food with a on a salad plate with pomegranate arils next to it
    Print Recipe
    5 from 1 vote

    Lactose-Free Ricotta

    This lactose-free ricotta cheese is almost similar in texture and flavor to the real thing. And it's very easy to make.
    Prep Time10 minutes mins
    Cook Time0 minutes mins
    Resting Time2 days d
    Total Time2 days d 10 minutes mins
    Course: Staple
    Cuisine: Raw/No-Bake
    Keyword: almonds
    Servings: 1 cup (143 g)
    Calories: 833kcal
    Author: Naïby

    Ingredients

    • 1 cup almonds soaked for 8-12 hrs, drained and peeled or blanched for a few seconds (Notes)
    • ¼ cup water
    • 2 tablespoons lemon juice
    • 1 clove garlic crushed (about ½ teaspoon)
    • ¼ teaspoon salt
    Get Recipe Ingredients

    Instructions

    • Place all ingredients in the food processor and process until creamy. Add more water for a wetter consistency.
    • Place the nut mixture in a nut milk bag or strainer lined with gauze (or cheesecloth) and let the cream mixture drain into a bowl. Or, press it lightly without completely filtering all the liquid coming out.
    • Put the nut cheese in a jar or shape it with your hands, then put it in the refrigerator for 8-12 h to firm or use immediately.
    • Serve in your favorite dishes.

    Notes

    If you forget to soak the almonds, you can fast-forward to 30 min.
    Add fresh herbs such as basil or rosemary, pitted olives and sun-dried tomatoes to create new flavors.
    Placed in an airtight container, Quick Almond Ricotta will keep for up to four or five days.

    Nutrition

    Calories: 833kcal | Carbohydrates: 34g | Protein: 31g | Fat: 71g | Saturated Fat: 5g | Polyunsaturated Fat: 17g | Monounsaturated Fat: 44g | Trans Fat: 1g | Sodium: 587mg | Potassium: 1051mg | Fiber: 18g | Sugar: 6g | Vitamin A: 4IU | Vitamin C: 13mg | Calcium: 387mg | Iron: 5mg

    Get Your Free Plant-Based Eating Toolkit and More

    Subscribe to my newsletter and unlock my plant-based course, nutrition charts, recipe secrets, and exclusive updates to prepare wholesome, varied & balanced meals effortlessly. All you need is a good appetite. Subscribe!

    Smiling girl with big afro sitting cross-legged on a sofa

    Hi there!

    I'm on a mission to help you get nutrient-dense, easy, and mouthwatering plant-based recipe ideas so you can feel stimulated, well-equipped, and confident to eat and cook better.

    Learn more about me →

    Curative Radicchio Salad to the Power of 3

    Jan 2, 2018 · Leave a Comment

    Top view of two bols of radicchio and endive salad with pistachios and almond ricotta

    The radicchio salad is very appetizing but also very nourishing and cleansing. As well as radicchio, it has endive and arugula to keep your cells happy and degenerative disease-free!

    Top view of two bols of radicchio and endive salad with pistachios and almond ricotta
    Radicchio Salad

    What's the Difference between Radicchio and Red Cabbage?

    Maybe you think it’s some kind of strange red cabbage. Maybe you’ve already wondered if you’ve put red cabbage disguised as radicchio inadvertently into your recipes. Maybe once, you’ve asked the cashier what the difference was, and she didn’t know any more than you did.

    No kidding! I already heard a story like this.

    Once, someone went to the cash with one radicchio, and the cashier entered the red cabbage’s code of out of ignorance. Because red cabbage and radicchio sometimes look alike.

    But when it comes to price, the radicchio costs five times as much. And when it comes to taste, they are as different as parsley and cilantro.

    Keep reading to know even more differences between the two and why it’s worth using this purple Italian leafy vegetable in your recipes.

    How to Differentiate Radicchio and Red Cabbage

    The next time you are in the grocery store, and you have no idea which vegetable to choose, know this:

    Radicchio

    • As part of the chicory family, it’s often called Italian chicory. This explains its pronounced and bitter taste.
    • It’s compact like red cabbage, but its leaves are thinner and softer, unlike the firm, waxed texture of red cabbage leaves.
    • It’s burgundy red with white streaks.
    • It’s light when you hold it in your hand and soft to the touch, so the price can vary between $2-$4/lbs.

    Red cabbage

    • As part of the cruciferous family, it’s another variety of cabbage; its flavor and texture are similar to those of green cabbage.
    • It is, in fact, more purple than red, and its color is uniform. It’s more massive and firm and has a waxed texture. The price is usually below $1.40/lbs.

    Why Use Radicchio?

    If ever the price of radicchio puts you off and you try to be smart by choosing red cabbage, you’ll be making a big mistake (ok, maybe not so big).

    Both have their places in the kitchen but are not interchangeable. Red cabbage is best used in shredded cabbage salad, and radicchio is excellent in mixed salads.

    If you’re looking for an Italian salad with a strong taste, you’d better go with radicchio. Because of its bitterness, it blends well with acidic ingredients, such as citrus or lemon vinaigrette with sweet ingredients.

    Nutritionally, radicchio is as nutrient-rich as red cabbage, so I won’t compare the two.

    The Triple Power of My Mix Salad

    The following salad is very appetizing but also very nourishing and cleansing. I mixed radicchio leaves with endive leaves and arugula to increase the healing properties of the mixed greens.

    Endive belongs to the same family of radicchio, which purifies the blood, stimulates the immune system, and acts as a diuretic. Arugula belongs to the cruciferous family, which is known for its anti-cancer properties. It cleans heavy metals (chelation properties) and removes pesticides and herbicides from the body. It’s also rich in protein.

    To prepare this recipe even quicker, you can add a mesclun salad to your radicchio leaves to enjoy the same benefits.

    For my next recipe, I initially wanted to add an exotic and sweet taste by trying to recreate pomegranate molasses, often used in Middle Eastern cuisine. The goal here was to cut the bitterness of the dish. I extracted the pomegranate juice that I had mixed with the maple syrup previously, and then I made my vinaigrette.

    Yeah, I could’ve alternatively used store-bought pomegranate molasse. But you know, I wanted to stay on the whole food side. Not a biggie if you use it.

    But after I remembered my main motto: help people prepare simple and quick dishes. So to stay in the whole food arena, I opted for raspberries. Raspberries have the same sweet and sour taste and are just as delicious and as antioxidant-packed as pomegranate.

    Endives and pistachios give the crunchy side. The lemon raspberry vinaigrette brings freshness and sweetness to the mouth. As a finishing touch, I added my almond ricotta to provide an exquisite and comforting sensation.

    If you want to have a pleasant tasting experience, even if the radicchio is more expensive, it’s totally worth it.

    Radicchio Salad with Lemon Raspberry Vinaigrette

    Top view of two bols of radicchio and endive salad with pistachios and almond ricotta
    Radicchio salad with lemon raspberry vinaigrette

    If you try this recipe, I want to know about it! I always appreciate your feedback. Leave a star rating in the recipe card right below and/or a review in the comment section further down the page. You can also follow me on Pinterest, Facebook, or Instagram. Sign up for my email list, too!

    Top view of two bols of radicchio and endive salad with pistachios and almond ricotta
    Print Recipe
    5 from 1 vote

    Radicchio Salad

    Endives and pistachios give the crunchy side. The lemon raspberry vinaigrette brings freshness and sweetness to the mouth. As a finishing touch, I added my almond ricotta to provide an exquisite and comforting sensation.If you want to have a pleasant tasting experience, even if the radicchio is more expensive, it’s totally worth it.
    Prep Time20 minutes mins
    Total Time20 minutes mins
    Course: Salad
    Cuisine: American, Canadian
    Diet: Vegan
    Keyword: endive
    Servings: 2 portions as a side or 1 portion as a meal
    Calories: 284kcal
    Author: Naïby

    Ingredients

    Salad

    • 2 large handfuls arugula
    • 1 radicchio leaves removed
    • 1 endive leaves separated
    • ¼ cup almond ricotta cheese
    • 1 handful pistachios coarsely chopped

    Lemon raspberry vinaigrette

    • 2 tablespoons olive oil or water
    • 2 tablespoons lemon juice
    • 1 tablespoon maple syrup
    • ¼ cup raspberries frozen or fresh
    • ½ small clove garlic crushed
    • Pinch salt
    Get Recipe Ingredients

    Instructions

    • To make the vinaigrette, place all the ingredients in a high-powered blender and blend until smooth. Set aside.
    • To make the salad, place the arugula, radicchio, and endive in a mixing bowl. Crumble the almond ricotta over the salad. Top with vinaigrette and mix well. Sprinkle with pieces of pistachios.
    • Serve immediately.

    Notes

    Variations

    Add sunflower sprouts and replace the pistachios with pine nuts.

    Conservation

    Placed in an airtight container without the vinaigrette, this salad can be kept for four days.

    Nutrition

    Calories: 284kcal | Carbohydrates: 21g | Protein: 6g | Fat: 22g | Saturated Fat: 3g | Polyunsaturated Fat: 2g | Monounsaturated Fat: 10g | Sodium: 51mg | Potassium: 781mg | Fiber: 10g | Sugar: 8g | Vitamin A: 4908IU | Vitamin C: 25mg | Calcium: 166mg | Iron: 3mg

    Get Your Free Plant-Based Eating Toolkit and More

    Subscribe to my newsletter and unlock my plant-based course, nutrition charts, recipe secrets, and exclusive updates to prepare wholesome, varied & balanced meals effortlessly. All you need is a good appetite. Subscribe!

    Smiling girl with big afro sitting cross-legged on a sofa

    Hi there!

    I'm on a mission to help you get nutrient-dense, easy, and mouthwatering plant-based recipe ideas so you can feel stimulated, well-equipped, and confident to eat and cook better.

    Learn more about me →

    Mighty Chia Porridge

    Jan 2, 2018 · Leave a Comment

    Chia pudding with sliced bananas, berries, pumpkin seeds and sunflower seeds in a colorful bowl

    When I look for something hearty in the morning, chia pudding is always my go-to dish. It’s easy and quick to make. Because I’m not going to lie to you, I’m lazy. Yes, I swear!

    And it’s perfect if you want to eat something comforting, cheerful, and enjoyable for breakfast.

    Chia pudding with sliced bananas, berries, pumpkin seeds and sunflower seeds in a colorful bowl
    Chia pudding with sliced bananas, berries, and seeds

    How to Make Chia Pudding

    Making chia pudding is very simple. It contains only the following main ingredients: water, almonds, vanilla, a sweetener, and chia seeds. Nothing complicated.

    But this time, I wanted to put more colors, more textures, and more contrasts. So, I remembered a breakfast I enjoyed during my short stay in New York during the holiday season. My man and I went to a small Australian style cafe in the West Village, called the Bluestone Lane Café.

    In this lovely cafe with colors reminiscent of the beach, I chose a quinoa porridge with fresh fruits and nuts. I liked it so much that I wanted to recreate it in my own way.

    I changed the ingredients a bit, and frankly, it was also effortless and quick to make.

    Why Chia Seeds Are the Perfect Superfood

    Ch-ch-ch-chia! Do you know the famous ad for the Chia Pet? I don’t remember when exactly it was broadcasted on American channels — I must’ve been too young. The ad showed how to grow the pet’s green “hair”. All you needed to do was this: dip the animal-shaped figurine into the water, spread the chia seeds on the terracotta body with a spatula, water it from time to time, and admire the hair, as in the sprouts, grow.
    And to enhance your experience, you could also purchase a whole collection of animals: the bear cub, the puppy, the kitten, the ram, and the ox. You could even add a tree to keep them company. Yeah, really.

    Instead of praising their luxurious “fur”, they should have suggested eating the sprouts too!

    I love chia seeds because they’re so filling.

    And these tiny seeds seem to bring so many benefits for good health. I say “seem” because the trials on humans are limited, as is often the case with food research.
    But anecdotal evidence of the positive effects of chia is numerous.

    Dr. Coates is chia seeds’ main advocate and researcher. According to him, chia seeds can increase your energy, stabilize your blood glucose level (by slowing the absorption of sugars), improve your digestion, and reduce “bad” cholesterol (total cholesterol, triglycerides, LDL). Chia seeds can protect you against cardiovascular disease, reduce the risk of type 2 diabetes and obesity, and relieve constipation.

    Of all the seeds, chia has the highest protein content. On top of it, it’s a complete protein. It’s also rich in omega 3 (8 times more than salmon), magnesium (15 times more than broccoli), calcium (6 times more than cow’s milk), vitamin C, iron… Yeah! Full of good things!

    But beware! There’s a way to eat chia seeds. It’s essential to soak the seeds before consumption as they absorb 10 times their volume of water.

    This means that if this happens in your digestive system, you could find yourself on your elimination throne in pain reading the latest gossip in People magazine.

    But it won’t happen. I’ll show you how to enjoy chia seeds in this satisfying breakfast.

    The Little Secret that'll Give You Double the Benefits

    Before, I always used to strain the nut liquid from the pulp. That’s how I learned to make nut milk. I would discard the pulp and hope to use it for another occasion. I noticed that I would always end up wasting it because I’d forget I had any.

    But one day, I thought to myself: What if I kept and used everything? What if I didn’t strain the liquid?

    The rationale was that the pulp would act like added fiber in the pudding. So I tried it, and I noticed something. Instead of putting my usual ⅓ cup chia seeds in 1 cup milk, I would put less. The quantity would amount to ¼ cup instead!

    Ok, not a super big difference but still. That’s about 2 teaspoons less. Over time, it adds up, you know. Chia seeds cost too much for my taste. Where I live, a pack can easily go for $8 + 14% tax (CAD).

    And I discovered something else too.

    By not straining the milk, not only do you save money, but you save time.

    Now, you’re talking!

    Mighty Chia Pudding with Berries, Banana, Sunflower and Pumpkin Seeds

    Top view of chia pudding with sliced bananas, berries, pumpkin seeds and sunflower seeds in a colorful bowl
    Chia pudding with sliced bananas, berries, and seeds

    This pudding is really versatile and perfect for winter. The basic recipe is almond milk with chia seeds, which turns into a pudding-like consistency. Then you add whatever toppings that rock your boat.

    The advantage of this dish is that you can prepare a larger quantity in advance and put it in an airtight container in the fridge. In this case, make sure the chia seeds and the almonds portions are the same. To tell you the truth, I prefer adding chia seeds into the nut milk the day I’m eating it. I find that when it’s done a few days prior, the mix becomes too dense. But that’s just me.

    Anyway, you can get really creative with the toppings. I changed them so many times that I’ve lost count. Here, I added nuts for the crunchy side and fruit for the mellow side. This is to create contrast. I could’ve also put granola, buckwheat seeds, fruit puree, dried fruit, or nut butter.

    And for the almond milk, you can also flavor it as you wish. With cinnamon, cardamom, ginger, lemon zest, or orange. Whatever makes you happy!

    If you try this recipe, I want to know about it! I always appreciate your feedback. Leave a star rating in the recipe card right below and/or a review in the comment section further down the page. You can also follow me on Pinterest, Facebook, or Instagram. Sign up for my email list, too!

    Print Recipe
    4 from 1 vote

    Chia Porridge

    Are you looking for a hearty and comfort breakfast? Enjoy this chia pudding with fresh fruit and nuts, perfect for the winter season.
    Prep Time15 minutes mins
    Total Time15 minutes mins
    Course: Breakfast
    Cuisine: Raw/No-Bake
    Keyword: almonds, chia seeds, Medjool dates
    Servings: 1
    Calories: 812kcal
    Author: Naïby

    Ingredients

    • 1 cup water
    • ¼ cup almonds
    • 1 tablespoon vanilla extract
    • 1 Medjool date or 2 regular dates
    • ¼ cup chia seeds

    Toppings

    • ½ banana cut into slices
    • 2 tablespoons berries frozen, warmed in lukewarm water
    • 2 tablespoons pumpkin seeds
    • 2 tablespoons sunflower seeds
    Get Recipe Ingredients

    Instructions

    • In the blender, put the water, almonds, vanilla, dates and blend well. Transfer the unfiltered almond milk to a jar for other uses.
    • In each bowl, transfer 1 cup of unfiltered almond milk and add the chia. Let stand until the preparation reaches a thick consistency.
    • Place the fruits and nuts.
    • Serve immediately.

    Notes

    By not filtering milk, first you save time and secondo, you save in chia — which already costs too much for my taste — thanks to the remaining pulp of almonds.

    Nutrition

    Calories: 812kcal | Carbohydrates: 69g | Protein: 26g | Fat: 51g | Saturated Fat: 5g | Polyunsaturated Fat: 23g | Monounsaturated Fat: 19g | Trans Fat: 1g | Sodium: 24mg | Potassium: 1129mg | Fiber: 26g | Sugar: 30g | Vitamin A: 124IU | Vitamin C: 7mg | Calcium: 417mg | Iron: 8mg

    Get Your Free Plant-Based Eating Toolkit and More

    Subscribe to my newsletter and unlock my plant-based course, nutrition charts, recipe secrets, and exclusive updates to prepare wholesome, varied & balanced meals effortlessly. All you need is a good appetite. Subscribe!

    Smiling girl with big afro sitting cross-legged on a sofa

    Hi there!

    I'm on a mission to help you get nutrient-dense, easy, and mouthwatering plant-based recipe ideas so you can feel stimulated, well-equipped, and confident to eat and cook better.

    Learn more about me →

    A Divine Pecan Pie that You Can Make in No Time

    Jan 2, 2018 · Leave a Comment

    Pecan pie on a cooling rack

    You don’t think it can be as decadent as the traditional version?

    You'll think otherwise when you swallow my no-bake chocolate pecan pie.

    Slice of pecan pie in a small plate with the whole pecan pie behind it
    No-bake pecan pie, or call it raw pecan pie

    Sweet, rich, melting... those are the things that make your eyes roll when you indulge in a sugar pie.

    To this, add chocolaty and caramelly... and OMG! You’re a goner! You’re in another universe, you’re in heaven.

    The problem is, making this type of pie has a couple of downsides.

    Primo, it requires that you be patient (two hours on average to bake it). And second, it’s suicidal.

    Yeah! it’s suicidal because eating this type of pie involves the ingestion of ingredients that will bring your insulin level and your scale’s weight indicator to the roof.

    So how can you indulge in this treat without the harmful effects and, above all, without the guilt?

    Don’t worry. I have the solution that will satisfy your fantasies.

    What Makes Chocolate Pecan Pie so Special

    Chocolate pecan pie is basically a sweet and melting topping that includes lots of chocolate, pecans, sugar, corn syrup, butter, and eggs. It’s native to the southern United States, where pecans grow plenty.

    A little bourbon or rum is often added to the filling. This enhances the slightly sour-sweet, almost caramel-like pecan flavor and also counteracts the pie’s sweet taste. Pecan pie is probably the most famous dessert there.

    But its history is nebulous.

    Some say the French invented this sweet pie after settling in New Orleans as they were introduced to pecans in the 18th century. Others say it appeared in Alabama in the 19th century, but there’s no evidence.

    It’s also believed that the economist of Karo house — a company specializing in the manufacture and distribution of ready-to-eat products — created this recipe in the mid-1920s. That’s because the pie often contains Karo (corn syrup).

    In short, what we know for sure is that the company really popularized in the 40s and 50s and since then, it’s been an integral part of the of Southern American culture. We can find several variants of it: caramel, cinnamon, peanut butter...

    Anyway, who cares where it comes from! We thank the inventors for creating such a delight, which is especially shared during the holiday season.

    A Quick and Reinvented Pecan Pie

    In the traditional version, the filling is what makes the pie yummy.

    You have to prepare the dough first. I'm not a baker at all, so I won’t explain how to make it. All I know is that it can take about 1-2 hours. Then you need to roast the nuts. After, you prepare the filling — you melt the chocolate and the mixture with the other ingredients (eggs, corn syrup, sugar, cocoa powder, bourbon, and salt). Finally, you decorate the top with nuts and cook for 45 minutes.

    My no-bake, raw version takes at most 30 min. It includes the crust and the garnish.

    Top view of nut crust in a tart pan and chocolate dough in a metallic plate

    And the best part? You won’t find eggs, refined sugar, dubious chocolate products, or corn syrup. This pie contains 98% whole, natural and nourishing ingredients (nuts, dried fruits, and raw cocoa) and…

    Top view of pecan pie ingredients in small mixing bowls. From top to bottom: coconut flakes, almonds, dates, and almond-walnut crust
    Pecan pie ingredients. From top to bottom: coconut flakes, almonds, dates, and almond-walnut crust

    … it includes 2% maple syrup and an ingredient that is not the most whol-y.

    Rum.

    Oh! No, you didn’t! I totally did. Come on! I don’t think 2 teaspoons rum will kill your brain cells that much. Ok, maybe a tiny little bit. Here, I made an exception to stay faithful to the theme and for another reason that I’ll explain shortly.

    For the texture, when I saw that the original recipe required mixing nuts and cocoa/chocolate, I immediately thought of my brownie recipe. I followed that recipe and added figs to add a soft and melting side.

    Top view of chopped dried figs and walnuts
    Chopped dried figs and walnuts

    Then I replaced the corn syrup of the original recipe with maple syrup to bring a little more moisture. For the crust, I used nuts. I confess I hesitated first because I felt there were too many nuts. And then I thought: well it's like eating an energy ball or bar in a different form. To lighten it up a bit, I added some grated coconut. As far as alcohol is concerned, at first I wanted to put some rum extract.

    But when I looked at the ingredients at the grocery store, I immediately got turned off.

    The Case of Forbidden Ingredients

    Yeah… My eyes stopped at "propylene glycol" and it was the end of it.

    Forgive me, but I didn’t like the idea of putting windshield washer in my food. Just like ethylene glycol, glycols found in most edible products are the active ingredient in several surprising products.

    For example, here's what Health Canada has to say about ethylene glycol:

    In lesser quantities, ethylene glycol may also be used in asphalt emulsion paints; as a coolant and heat transfer fluid; in low-pressure laminates; in brake fluids; in glycol diacetate production; in low-freezing dynamite; as a solvent mixture for cellulose esters and ether; and in cellophane, cosmetics (up to 5%), lacquers, alkyd resins, printing inks, wood stains, leather dyeing, textile processing, humectants, ballpoint pen inks, detergents, solvents, polyurethane foam, medicinals, adhesives and other products (ATSDR, 1993; Lewis, 1993). The quantities used in Canada for each of these products is not known.

    Some people think that these components don’t pose a great health risk, but I prefer to abstain. Thousands of studies have already shown their toxicity. (Source)

    Ok, so organic rum extract was definitely a better option, but I couldn’t find any.

    So I opted for real rum. Here. End of story. I wanted Barbancourt rum (which comes from my parents home country) but I didn’t have any (pain).

    Chocolate pecan pie dough in a metallic plate in front of a bottle of rhum and next dried figs on small plate, cocoa powder in a tiny glass mixing bowl, and almonds and walnuts spread on the surface
    Chocolate pecan pie ingredients: chocolate dough, rhum, dates, cocoa powder, and almonds and walnuts

    Anyway, rum won’t be responsible for making you lose your mind; the taste of chocolate and the melting texture will.

    All in all, this pie is simply lu-xu-rious. And wait a second, VERY rich. So don’t go crazy stuffing your face with it.

    You're not supposed to take more than one slice. No more than a small slice, ok?!

    Divine Chocolate Pecan Pie

    Pecan pie on a cooling rack
    Chocolate Pecan Pie

    If you try this recipe, I want to know about it! I always appreciate your feedback. Leave a star rating in the recipe card right below and/or a review in the comment section further down the page. You can also follow me on Pinterest, Facebook, or Instagram. Sign up for my email list, too!

    Pecan pie on a cooling rack
    Print Recipe
    5 from 1 vote

    Chocolate Pecan Pie

    This pie is simply lu-xu-rious. And wait a second, VERY rich. So don’t go crazy stuffing your face with it.
    Prep Time25 minutes mins
    Cook Time0 minutes mins
    Total Time25 minutes mins
    Course: Dessert
    Cuisine: Raw/No-Bake
    Keyword: almonds, coconut flakes, Medjool dates
    Servings: 1 9-inch pie
    Calories: 3262kcal
    Author: Naïby

    Ingredients

    Crust:

    • 1 ½ cups almonds
    • ½ cup grated coconut unsweetened and dried
    • 8 Medjool dates or 16 small dates

    Garnish

    • 1 ½ cup pecan
    • Pinch salt
    • ⅓ cup cacao powder raw
    • ½ teaspoon vanilla extract
    • 1 teaspoon maple syrup
    • 1 teaspoon rum (optional)
    • ¼ cup dried figs cut into pieces
    Get Recipe Ingredients

    Instructions

    • To make the crust, place the almonds and coconut flakes in the food processor fitted with the "S" blade and process until coarsely ground. Add the dates and process until the mixture looks like a fine and grainy texture and begins to stick together. Don’t overprocess. Transfer the mixture to a 9-inch (23 cm) deep-hinge mold, spread it out and squeeze it with your fingers or a spatula (if too sticky).
    • To make the garnish, cut ¼ cup pecans and set aside. Place the remaining nuts and coconut in the food processor fitted with the "S" blade and process until a granular consistency. Add the dates and process until the mixture sticks together. Add the cocoa, vanilla and optional rum and process until well blended. Transfer to the bottom of the pie and press firmly. Decorate with pecans on top.

    Nutrition

    Calories: 3262kcal | Carbohydrates: 266g | Protein: 73g | Fat: 245g | Saturated Fat: 44g | Polyunsaturated Fat: 59g | Monounsaturated Fat: 129g | Trans Fat: 1g | Cholesterol: 3mg | Sodium: 33mg | Potassium: 4414mg | Fiber: 73g | Sugar: 168g | Vitamin A: 375IU | Vitamin C: 3mg | Calcium: 910mg | Iron: 20mg

    Get Your Free Plant-Based Eating Toolkit and More

    Subscribe to my newsletter and unlock my plant-based course, nutrition charts, recipe secrets, and exclusive updates to prepare wholesome, varied & balanced meals effortlessly. All you need is a good appetite. Subscribe!

    Smiling girl with big afro sitting cross-legged on a sofa

    Hi there!

    I'm on a mission to help you get nutrient-dense, easy, and mouthwatering plant-based recipe ideas so you can feel stimulated, well-equipped, and confident to eat and cook better.

    Learn more about me →

    Vitamin C Power Cauliflower Salad with Cranberry, Orange and Pomegranate

    Jan 1, 2018 · Leave a Comment

    You must be kidding... $8!

    Filled with indignation, my voice echoed throughout the small grocery store in my neighborhood... "I know, I know," the owner told me. "Things haven't been going well in California for some time now. So, that's the price cauliflower. And it's the same for broccoli."

    Well, I know that cauliflower is out of season in Quebec since October, but let's not exaggerate! On top of this, I really wanted to make this recipe for the holiday season, which incorporates other seasonal ingredients in the winter: oranges, pomegranate, and fresh cranberries. 😭

    Never mind! I give up.

    For several weeks I watched the price of cauliflower. And I shouted victory when I saw it at $3. Not a very beautiful and not organic cauliflower, but still. Quickly, I did a check in my brain, beep, beep, beep, and I remembered that it was on the list of Clean 15, the 15 foods considered safe relative to the pesticide load, according to the Environnmental Working Group.

    Without hesitation, I put it in my grocery basket to finally create this recipe that I hoped to concoct for a month already!

    And I loved the result.

    Cranberries and Company

    Fresh cranberries
    Fresh cranberries

    Apart from the drink and the traditional cranberry sauce, these small berries are also delicious in chutneys, pies, and other desserts. Recently, I made a kind of relish with cranberries and orange.

    These two ingredients are a classic combination. So, I wanted to bring this "relish" in the recipe that I will present to you in a few moments.

    At the last family Christmas dinner, on my boyfriend's side, I prepared a quinoa salad with fresh cranberries, pomegranate, and dill. And everyone loved it.

    In short, I was inspired by this recipe — and another one I saw online somewhere — to transform it into a raw version. To get the same grainy texture, I used that vegetable that shook me so much earlier: cauliflower!

    Then, as red and green are complementary colors, I decided to add greenery to my red preparation. I then sweetened it to counterbalance the crispy side of cranberries. Then I went for kale, another crucifer (cauliflower is one too), and mint, as herbs. And finally, I added nuts to have some crunch. Pecans. But it could have been almonds, walnuts, etc.

    Top view of mint sprigs on brown paper, cauliflower rice in a mixing bowl, honey in a measuring spoon, kale leaf with half of a pomegranate, fresh cranberries and pecans spread apart, olive oil in a tiny mixing bowl, and an orange sliced in two
    Cauliflower salad ingredients. Clockwise: mint sprigs, cauliflower rice, honey, kale, pomegranate, fresh cranberries, pecans, olive oil, and orange
    Top view of shredded kale
    Shredded kale

    What else can I say about this salad? It's doubly rich in vitamin C, thanks to cranberries and oranges, and doubly rich in antioxidants, thanks to cranberries and pomegranate.

    By the way, cranberries have been found to contain polyphenols that nourish the good bacteria in the intestinal flora, which fight obesity and all of its accompanying diseases, such as type 2 diabetes. I'll tell you more about it another time.

    But in the meantime, enjoy this easy-to-prepare, tart salad.

    Cauliflower Salad with Cranberry, Orange and Pomegranate

    Cauliflower salad with cranberries, orange and pomegranate in a small metallic bowl
    Cauliflower salad with cranberries, orange and pomegranate

    If you try this recipe, I want to know about it! I always appreciate your feedback. Leave a star rating in the recipe card right below and/or a review in the comment section further down the page. You can also follow me on Pinterest, Facebook, or Instagram. Sign up for my email list, too!

    Print Recipe
    5 from 1 vote

    Cauliflower Salad with Cranberry, Orange and Pomegranate

    What else can I say about this salad? It's doubly rich in vitamin C, thanks to cranberries and oranges, and doubly rich in antioxidants, thanks to cranberries and pomegranate.
    By the way, cranberries have been found to contain polyphenols that nourish the good bacteria in the intestinal flora, which fight obesity and all of its accompanying diseases, such as type 2 diabetes. I'll tell you more about it another time.
    But in the meantime, enjoy this easy-to-prepare, tart salad.
    Prep Time25 minutes mins
    Cook Time0 minutes mins
    Total Time25 minutes mins
    Course: Salad
    Cuisine: Canadian
    Keyword: cauliflower, cranberries, pomegranate, walnuts
    Servings: 4 medium portions or 2 large portions
    Calories: 285kcal
    Author: Naïby

    Ingredients

    • 1 small cauliflower roughly cut (about 3 cups or 365 g)
    • 2 cups cranberries
    • 2 tablespoons olive oil
    • 2 tablespoons honey
    • 2 large kale leaves stems removed and chopped (Note)
    • 2 tablespoons orange zest
    • 6 small oranges or 4 medium oranges, peeled, seeded and roughly cut
    • ½ cup pomegranate seeds
    • ¼ cup fresh mint
    • Pinch salt
    • ¼ cup walnuts to garnish
    Get Recipe Ingredients

    Instructions

    • Place the cauliflower in a food processor and process until a couscous-like grainy consistency. Transfer to a salad bowl and set aside.
    • Still in the food processor, place the cranberries, olive oil, and honey and pulse to cut roughly. Transfer to a small bowl and set aside.
    • Add cauliflower, kale, orange peel, orange-cranberry mixture, pomegranate, mint, salt and mix well.
    • Serve in bowls and garnish with nuts.
    • Placed in an airtight container in the refrigerator, this cauliflower salad will keep for 3 days.

    Notes

    Variants

    • You can use any type of kale: green, black, purple ...
    • For quinoa version, replace cauliflower with 2 cups cooked or sprinkled quinoa (1 cup cooked quinoa for about 2 cups when cooked).

    Nutrition

    Calories: 285kcal | Carbohydrates: 43g | Protein: 6g | Fat: 13g | Saturated Fat: 2g | Polyunsaturated Fat: 4g | Monounsaturated Fat: 6g | Sodium: 34mg | Potassium: 750mg | Fiber: 9g | Sugar: 28g | Vitamin A: 3335IU | Vitamin C: 157mg | Calcium: 141mg | Iron: 1mg

    Get Your Free Plant-Based Eating Toolkit and More

    Subscribe to my newsletter and unlock my plant-based course, nutrition charts, recipe secrets, and exclusive updates to prepare wholesome, varied & balanced meals effortlessly. All you need is a good appetite. Subscribe!

    Smiling girl with big afro sitting cross-legged on a sofa

    Hi there!

    I'm on a mission to help you get nutrient-dense, easy, and mouthwatering plant-based recipe ideas so you can feel stimulated, well-equipped, and confident to eat and cook better.

    Learn more about me →

    Delightful Whipped Coconut Cream

    Oct 3, 2017 · Leave a Comment

    Did you know that you could make a light and sweet whipped cream using canned coconut milk?

    Overhead view of whipped coconut cream in a bowl
    Whipped coconut cream

    Yes. You read right, canned coconut milk.

    For sure, using the flesh of a young Thai coconut would be ideal. Fresh, whole and natural foods are always my number one foods of choice.

    But its flesh makes it more difficult to obtain a fluffy texture (maybe one day I'll do it). The young Thai coconut texture is very gelatinous and you never know how much flesh you’ll get once you open it.

    Whereas, if you're looking for a quick and easy way to make whipped cream, canned coconut milk will give you the desired texture. Sorry. It will give you a divine texture.

    So, let's start right now to find out how to prepare this sinful delight.

    When to Use Canned Coconut Milk

    As I said earlier, fresh ingredients would be better than any canned product.

    Except that for some exotic ingredients, like young Thai coconut, they’re not always accessible. Sometimes you have to go around the city to find this rare product, and I understand that it’s not ideal for everyone.

    If you feel the need to treat yourself occasionally, I’d say that using canned coconut milk is a good option.

    But make sure your canned coconut milk contains nothing but coconut: the meat and the water.

    Some canned products include guar gum powder that I sometimes use to thicken my soups. So rest assured, it’s not some bad additive.

    This recipe is from Angela's Liddon Oh She Glows recipe book. To be quite honest, I don't remember if I used canned coconut milk with or without guar gum. I heard that each might give different results. That makes sense since sometimes, this happens to me. I'll check next time and let you know for sure.

    Anyway, you can replace dairy whipped creams with whipped coconut cream in recipes.

    But if you insist on using fresh coconut, use it to make coconut yogurt (recipe to follow later). The texture will be denser.

    No matter what you choose, coconut cream is an excellent accompaniment to desserts in general. Use coconut cream as a topping in fruit bowls, parfaits, granolas, etc. The sky's the limit!

    Whipped Coconut Cream

    Whipped coconut cream in a bowl with whip leaning on top if it.
    Whipped coconut cream

    If you try this recipe, I want to know about it! I always appreciate your feedback. Leave a star rating in the recipe card right below and/or a review in the comment section further down the page. You can also follow me on Pinterest, Facebook, or Instagram. Sign up for my email list, too!

    Print Recipe
    5 from 1 vote

    Coconut Whipped Cream

    Coconut whipped cream is an excellent accompaniment to desserts in general. Use coconut cream as a topping in fruit bowls, parfaits, granolas, etc. The sky's the limit!
    Prep Time10 minutes mins
    Cook Time0 minutes mins
    Refrigerating and Resting Time9 hours hrs
    Total Time9 hours hrs 10 minutes mins
    Course: Staple
    Cuisine: Raw/No-Bake
    Diet: Vegan
    Keyword: coconut milk
    Servings: 1 cup (175 to 250 mL)
    Calories: 812kcal
    Author: Naïby

    Ingredients

    • 1 can coconut milk
    • 1 tablespoon maple syrup honey or agave syrup
    • ½ teaspoon vanilla extract or 1 vanilla pod, seeds removed
    Get Recipe Ingredients

    Instructions

    • Refrigerate a can of coconut milk the day before (or for at least 8 hours). The next day, 1 hour before making the whipped cream, put a pothole or medium bowl in the freezer.
    • Turn the box of coconut milk upside down and open it with a can opener. Transfer the coconut water to another bowl and set aside for another occasion (for example, a smoothie or other).
    • With a spoon, take the solidified coconut cream and transfer it to the bowl previously placed in the freezer.
    • Using a hand mixer or whisk, whip the cream until light and fluffy. Add maple syrup and vanilla and mix gently.
    • Cover the bowl and put the whipped cream in the fridge until future use. It will firm up when refrigerated but will soften at room temperature.
    • Placed in an airtight container in the refrigerator, this coconut whipped cream will keep for up to 1 or 2 weeks.

    Nutrition

    Calories: 812kcal | Carbohydrates: 24g | Protein: 8g | Fat: 81g | Saturated Fat: 72g | Polyunsaturated Fat: 1g | Monounsaturated Fat: 3g | Sodium: 52mg | Potassium: 888mg | Sugar: 12g | Vitamin C: 4mg | Calcium: 91mg | Iron: 13mg

    Get Your Free Plant-Based Eating Toolkit and More

    Subscribe to my newsletter and unlock my plant-based course, nutrition charts, recipe secrets, and exclusive updates to prepare wholesome, varied & balanced meals effortlessly. All you need is a good appetite. Subscribe!

    Smiling girl with big afro sitting cross-legged on a sofa

    Hi there!

    I'm on a mission to help you get nutrient-dense, easy, and mouthwatering plant-based recipe ideas so you can feel stimulated, well-equipped, and confident to eat and cook better.

    Learn more about me →

    Attractive Apple Pie

    Oct 3, 2017 · Leave a Comment

    Apple pie on a white plateApple pie on a white plate

    Uh... What! Already!? But how?

    How are we already in October? Seems like it was yesterday that I went on vacation and prepared school supplies for my little one.

    A few days ago, I was walking with him, and he pointed out Halloween decorations hanging on a balcony of an apartment building. He asked me why they were there, and I answered, puzzled: I really don't know. In my mind, these people had to be a little too excited to have them there so early.

    I only realized that we started being in October when recently, I received an email about pumpkin recipe suggestions... listen to that: for Canadian Thanksgiving and Halloween! I'm not even done enjoying peaches and they're already talking to me about Cinderella's carriage?

    And what about the apples in all of that? Where are the apple recipes? OMG! (with my hand on my mouth.)

    I didn't even prepare any! I didn't even go apple picking!!! And Thanksgiving... but it's this weekend! Quick! Quick! I have to prepare something.

    And all of a sudden, I remembered a beautiful recipe from last year that I never published because it so happened that time flew like a thousand mile an hour.

    But I'm showing it to you now so that it doesn't slip out of my fingers, again.

    Bonked on the Head by Apples

    That's what happened to me when I realized we were in October. The beautiful and good times in Montreal must've completely delighted me.

    The thing is, people are still walking in shorts and the leaves have yet to turn red. But when I really think about it, some people around me have been hit with coughs and other winter diseases. Mmmh... I should've suspected something was wrong.

    I usually don't miss an opportunity to go apple picking and even take pictures — which I just don't publish because of lack of time or forgetfulness. But today, I'm going to release this recipe from my archives. And heck! If I'm going to do that, I might as well release for all my early photos as an aspiring food photographer.

    Apples in apple tree
    Apples in apple tree
    Back of a woman walking in an orchard
    My mom walking in the orchard
    Apples in wire baskets
    Taken in 2012 when I received my first T5i Rebel from my dad 😆

    Aaaaah! I feel much lighter now that I've shown them to you. All this wasn't a waste of time after all.

    Normally, after a good day in the orchard and bringing back four to six big bags of apples, I put some on the counter and some in the fridge to keep them longer.

    And I put the others in my apple pie.

    A Fake Baked Apple Pie

    This is the raw version of the traditional apple pie. You have to make this pie in three steps: the crust, the garnish, and the rosette. Oh! In fact, there's one last step: the icing. This is what will give the baked pie appearance.

    Yes, a completely fake baked apple pie. And it's very easy to do.

    The crust is primarily made with walnuts and almonds. I usually use dates as a binder — to hold the crust together — but this time I used raisins to give a Graham cookie and caramelized taste. My filling is simply a banana-apple purée to make your life easier. Why do I say that?

    Because you could also do something more sophisticated by using a mandolin to make thin apple slices, then filling the pie from bottom to top. But this would take more time.

    If that's what you'd prefer, choose Fuji or Gala apples. They hold much better. Also, for the filling, I used the food processor rather than the blender to give the purée a little texture.

    If you don't like the taste of bananas, you can use only apples or an apple-pear mixture to make a kind of apple-pear sauce.

    Finally, the frosting idea is to give a cooked appearance. But it's also to "cover up" the natural browning (oxidation) of apples, which is not very appetizing. But this tangy and spicy frosting sure is and it's delicious too. You'll know what I'm talking about when you read the list of ingredients.

    And psst! For a decadent effect, you can add whipped coconut cream over it.

    No-Bake Cinnamon Apple Pie

    Apple pie on a white plate

    If you try this recipe, I want to know about it! I always appreciate your feedback. Leave a star rating in the recipe card right below and/or a review in the comment section further down the page. You can also follow me on Pinterest, Facebook, or Instagram. Sign up for my email list, too!

    Apple pie on a white plateApple pie on a white plate
    Print Recipe
    5 from 1 vote

    No-Bake Apple Pie

    If you don't like the taste of bananas, you can use only apples or an apple-pear mixture to make a kind of apple-pear sauce.
    Finally, the frosting idea is to give a cooked appearance. But it's also to "cover up" the natural browning (oxidation) of apples, which is not very appetizing. But this tangy and spicy frosting sure is and it's delicious too. You'll know what I'm talking about when you read the list of ingredients.
    Prep Time30 minutes mins
    Cook Time0 minutes mins
    Total Time30 minutes mins
    Course: Dessert
    Cuisine: Raw/No-Bake
    Keyword: almonds, apples, bananas, walnuts
    Servings: 1 9-inch pie
    Calories: 2669kcal
    Author: Naïby

    Ingredients

    Crust

    • 1 cup almonds preferably soaked and dehydrated
    • 1 cup walnuts preferably soaked and dehydrated
    • 1 cup raisins Thompson
    • 1 teaspoon vanilla extract
    • 2 apples sections removed and cut into pieces
    • 1 banana
    • 2 dates pitted
    • ½ teaspoon ground cinnamon

    Cinnamon Icing

    • 2 tablespoons coconut oil warmed to the liquid state
    • 4 teaspoons coconut sugar preferably reduced to powder in a mill (Note)
    • ½ tablespoon lemon juice
    • ½ tablespoon ground cinnamon
    Get Recipe Ingredients

    Instructions

    • To make the crust, place almonds, walnuts in a food processor fitted with the "S" blade and process until the mixture looks like coarse breadcrumbs. Add the raisins and place them evenly over the mixture, then add the vanilla. Process until the mixture simply sticks together. Transfer the mixture to a 9-inch (23 cm) deep-hinge mold, spread it out and squeeze it with your fingers or a spatula (if it's too sticky).
    • To make the garnish, put in the food processor fitted with the blade in "S", apples, banana, dates, and cinnamon.
    • To make the icing, whisk together the liquid coconut oil, coconut powder sugar, lemon juice and cinnamon to form a smooth paste. With a brush, coat the top of the apples.
    • Placed in an airtight container in the refrigerator, this No-Bake Apple pie will keep for a week.

    Notes

    If the coconut sugar is not reduced to powder, it could leave lumps, but it does not matter if this step is omitted.

    Variant

    For the option of filling the pie with the whole apple slices, use 6 apples and double the amount of icing indicated above to coat some apples in the middle as well.

    Nutrition

    Calories: 2669kcal | Carbohydrates: 268g | Protein: 55g | Fat: 177g | Saturated Fat: 37g | Polyunsaturated Fat: 73g | Monounsaturated Fat: 56g | Trans Fat: 1g | Sodium: 82mg | Potassium: 3659mg | Fiber: 51g | Sugar: 81g | Vitamin A: 314IU | Vitamin C: 40mg | Calcium: 617mg | Iron: 14mg

    Get Your Free Plant-Based Eating Toolkit and More

    Subscribe to my newsletter and unlock my plant-based course, nutrition charts, recipe secrets, and exclusive updates to prepare wholesome, varied & balanced meals effortlessly. All you need is a good appetite. Subscribe!

    Smiling girl with big afro sitting cross-legged on a sofa

    Hi there!

    I'm on a mission to help you get nutrient-dense, easy, and mouthwatering plant-based recipe ideas so you can feel stimulated, well-equipped, and confident to eat and cook better.

    Learn more about me →

    Satisfying Almond Milk

    Sep 6, 2017 · 2 Comments

    I've come a long way.

    Today, I only have diffuse images in my memory of my first attempts at making almond milk. One thing was certain: I had no idea how to do it.

    My clearest memories go back a year before I really became interested in raw food while I was carrying my child.

    The leader in me was at its early stage.

    I remember that at the time, I'd peel the soaked almonds one by one before putting them in the blender. I sat quietly in front of the TV and I devoted myself to this long and heavy task. I took these tips on a website. Bad tips.

    Later, I followed the guidelines of my first book RAW Food: A Complete Guide for Every Meal of the Day by Erica and Irmela Lilja Palmcrantz. I learned that I did not have to peel the almonds. Awesome!

    But I thought the taste was a little bland.

    Then I bought Rawlicious from Peter and Beryn Daniel and at my first sip, I was thrilled! I had never tasted something so delicious.

    Even after taking my higher education course in Living Food at the Living Light Culinary Arts Institute, in California, this recipe still remains my favorite.

    Almond Milk

    Almond milk in a bottle
    Dairy-free milk

    If you try this recipe, I want to know about it! I always appreciate your feedback. Leave a star rating in the recipe card right below and/or a review in the comment section further down the page. You can also follow me on Pinterest, Facebook, or Instagram. Sign up for my email list, too!

    Print Recipe
    5 from 1 vote

    Almond Milk

    Almond milk is so easy to make. And it beats the commercial kind anytime!
    Prep Time10 minutes mins
    Total Time10 minutes mins
    Course: Staple
    Cuisine: Vegan
    Keyword: almonds
    Servings: 1 serving of 1.25 L
    Calories: 997kcal
    Author: Naïby

    Ingredients

    • 4 cups water
    • 1 cup almonds previously soaked the day before, drained and rinsed
    • 5 small dates or 2 ½ Medjool dates, pitted
    • 1 tablespoon honey or another vegan sweetener
    • 1 vanilla pod or 1 teaspoon vanilla extract
    Get Recipe Ingredients

    Instructions

    • Mix all ingredients in a blender (mixer) and filter into a milk bag or gauze or pass through a fine sieve.
    • Placed in an airtight container in the refrigerator, this almond milk will keep for 4 to 5 days.

    Notes

    It may omit to filter it for recipes that don't require a smoother texture.

    Nutrition

    Calories: 997kcal | Carbohydrates: 76g | Protein: 31g | Fat: 72g | Saturated Fat: 5g | Polyunsaturated Fat: 17g | Monounsaturated Fat: 44g | Trans Fat: 1g | Sodium: 50mg | Potassium: 1249mg | Fiber: 20g | Sugar: 45g | Vitamin A: 5IU | Vitamin C: 1mg | Calcium: 421mg | Iron: 6mg

    Get Your Free Plant-Based Eating Toolkit and More

    Subscribe to my newsletter and unlock my plant-based course, nutrition charts, recipe secrets, and exclusive updates to prepare wholesome, varied & balanced meals effortlessly. All you need is a good appetite. Subscribe!

    Smiling girl with big afro sitting cross-legged on a sofa

    Hi there!

    I'm on a mission to help you get nutrient-dense, easy, and mouthwatering plant-based recipe ideas so you can feel stimulated, well-equipped, and confident to eat and cook better.

    Learn more about me →

    • « Go to Previous Page
    • Go to page 1
    • Go to page 2
    • Go to page 3

    Primary Sidebar

    Smiling girl with big afro sitting cross-legged on a sofa

    Whole plant-based food advocate, recipe developer, food stylist & photographer, dedicated to sharing nutrient-rich plant-based recipe ideas that will make you feel stimulated, well-equipped, and confident to cook and eat better.

    Learn More

    Hand rolling a cabbage leaf, reading the ultimate guide to plant-based eating, click here, get your free course now

    Fall Recipes

    • Tomato and bread soup in a bowl on a wooden board
      Scrape-the-Bowl Pappa Al Pomodoro
    • Creamy corn fusilli with green onions and basil in a cast-iron pan on a wooden board and other decorative items
      Melissa Clark's Creamy Corn Pasta {Vegan Version}
    • Pumpkin Banana Bread {Easy and Healthy}
    • Tofu sisig in a sizzling cast-iron skillet
      Tasty Filipino Tofu Sisig Recipe {Healthy & Simple}
    • Blueberry cobbler topped with ice cream in a bowl with baking pan in the back
      Healthy Vegan Blueberry Cobbler
    • Velvety Butternut Carrot Ginger Soup

    Popular Posts

    • Easy Haitian Rice and Beans (Diri Ak Pwa)
    • Simple and Creamy Coconut Milk Alfredo Sauce in Pasta (Vegan + Gluten-free)
    • Homemade vegan half-and-half in three small glass jars and in front of a small mason jar of coconut cream, all on a piece of jute
      The Best Vegan Half-and-Half
    • Vegan Soup Joumou (Haitian Squash Soup)
    • Two glasses of lemonade garnished with mint on a surface
      Easy Healthy Homemade Lemonade with Mint
    • Three small glass jars of garlic-infused oil, surrounded by decorative garlic bulbs, one of which contains garlic cloves cut in half and the others have only the oil
      Life-Changing Garlic-Infused Oil {Low FODMAP}

    Footer

    ↑ back to top

    About

    • Privacy Policy
    • Disclaimer
    • Terms & Conditions
    • Accessibility Policy

    Newsletter

    Unlock recipe secrets and exclusive updates to prepare irresistible & friendly meals. All you need is a good appetite.
    Subscribe!

    Contact

    • Contact
    • Services
    • Press & Media

    As an Amazon Associate I earn from qualifying purchases.

    Copyright © 2021 Biting into Life

    • Français
    • English

    Rate This Recipe

    Your vote:


    A rating is required
    A name is required
    An email is required